 User Guide
Backup Manager — install & user guide
Backup Manager takes the configuration off every switch, router, firewall and server you own, on a schedule, and tells you when one of them changes. This guide takes you from a bare Ubuntu or CentOS machine to a working installation with one command, then through everything you will use day to day.
What it is
One place that holds the configuration of everything on your network, and shows you what changed.
Every device on your network holds a configuration that took someone a long time to get right. Backup Manager logs in to each of them on a schedule, takes that configuration away, and keeps every version it has ever seen. When a device fails you restore from last night. When something stops working you look at what changed and when.
It talks to equipment over SSH, including older kit that only accepts legacy ciphers, over Telnet for devices that offer nothing else, and over HTTP/HTTPS for firewalls with a config-export API. It runs on your own server — no cloud, no agent on the devices.
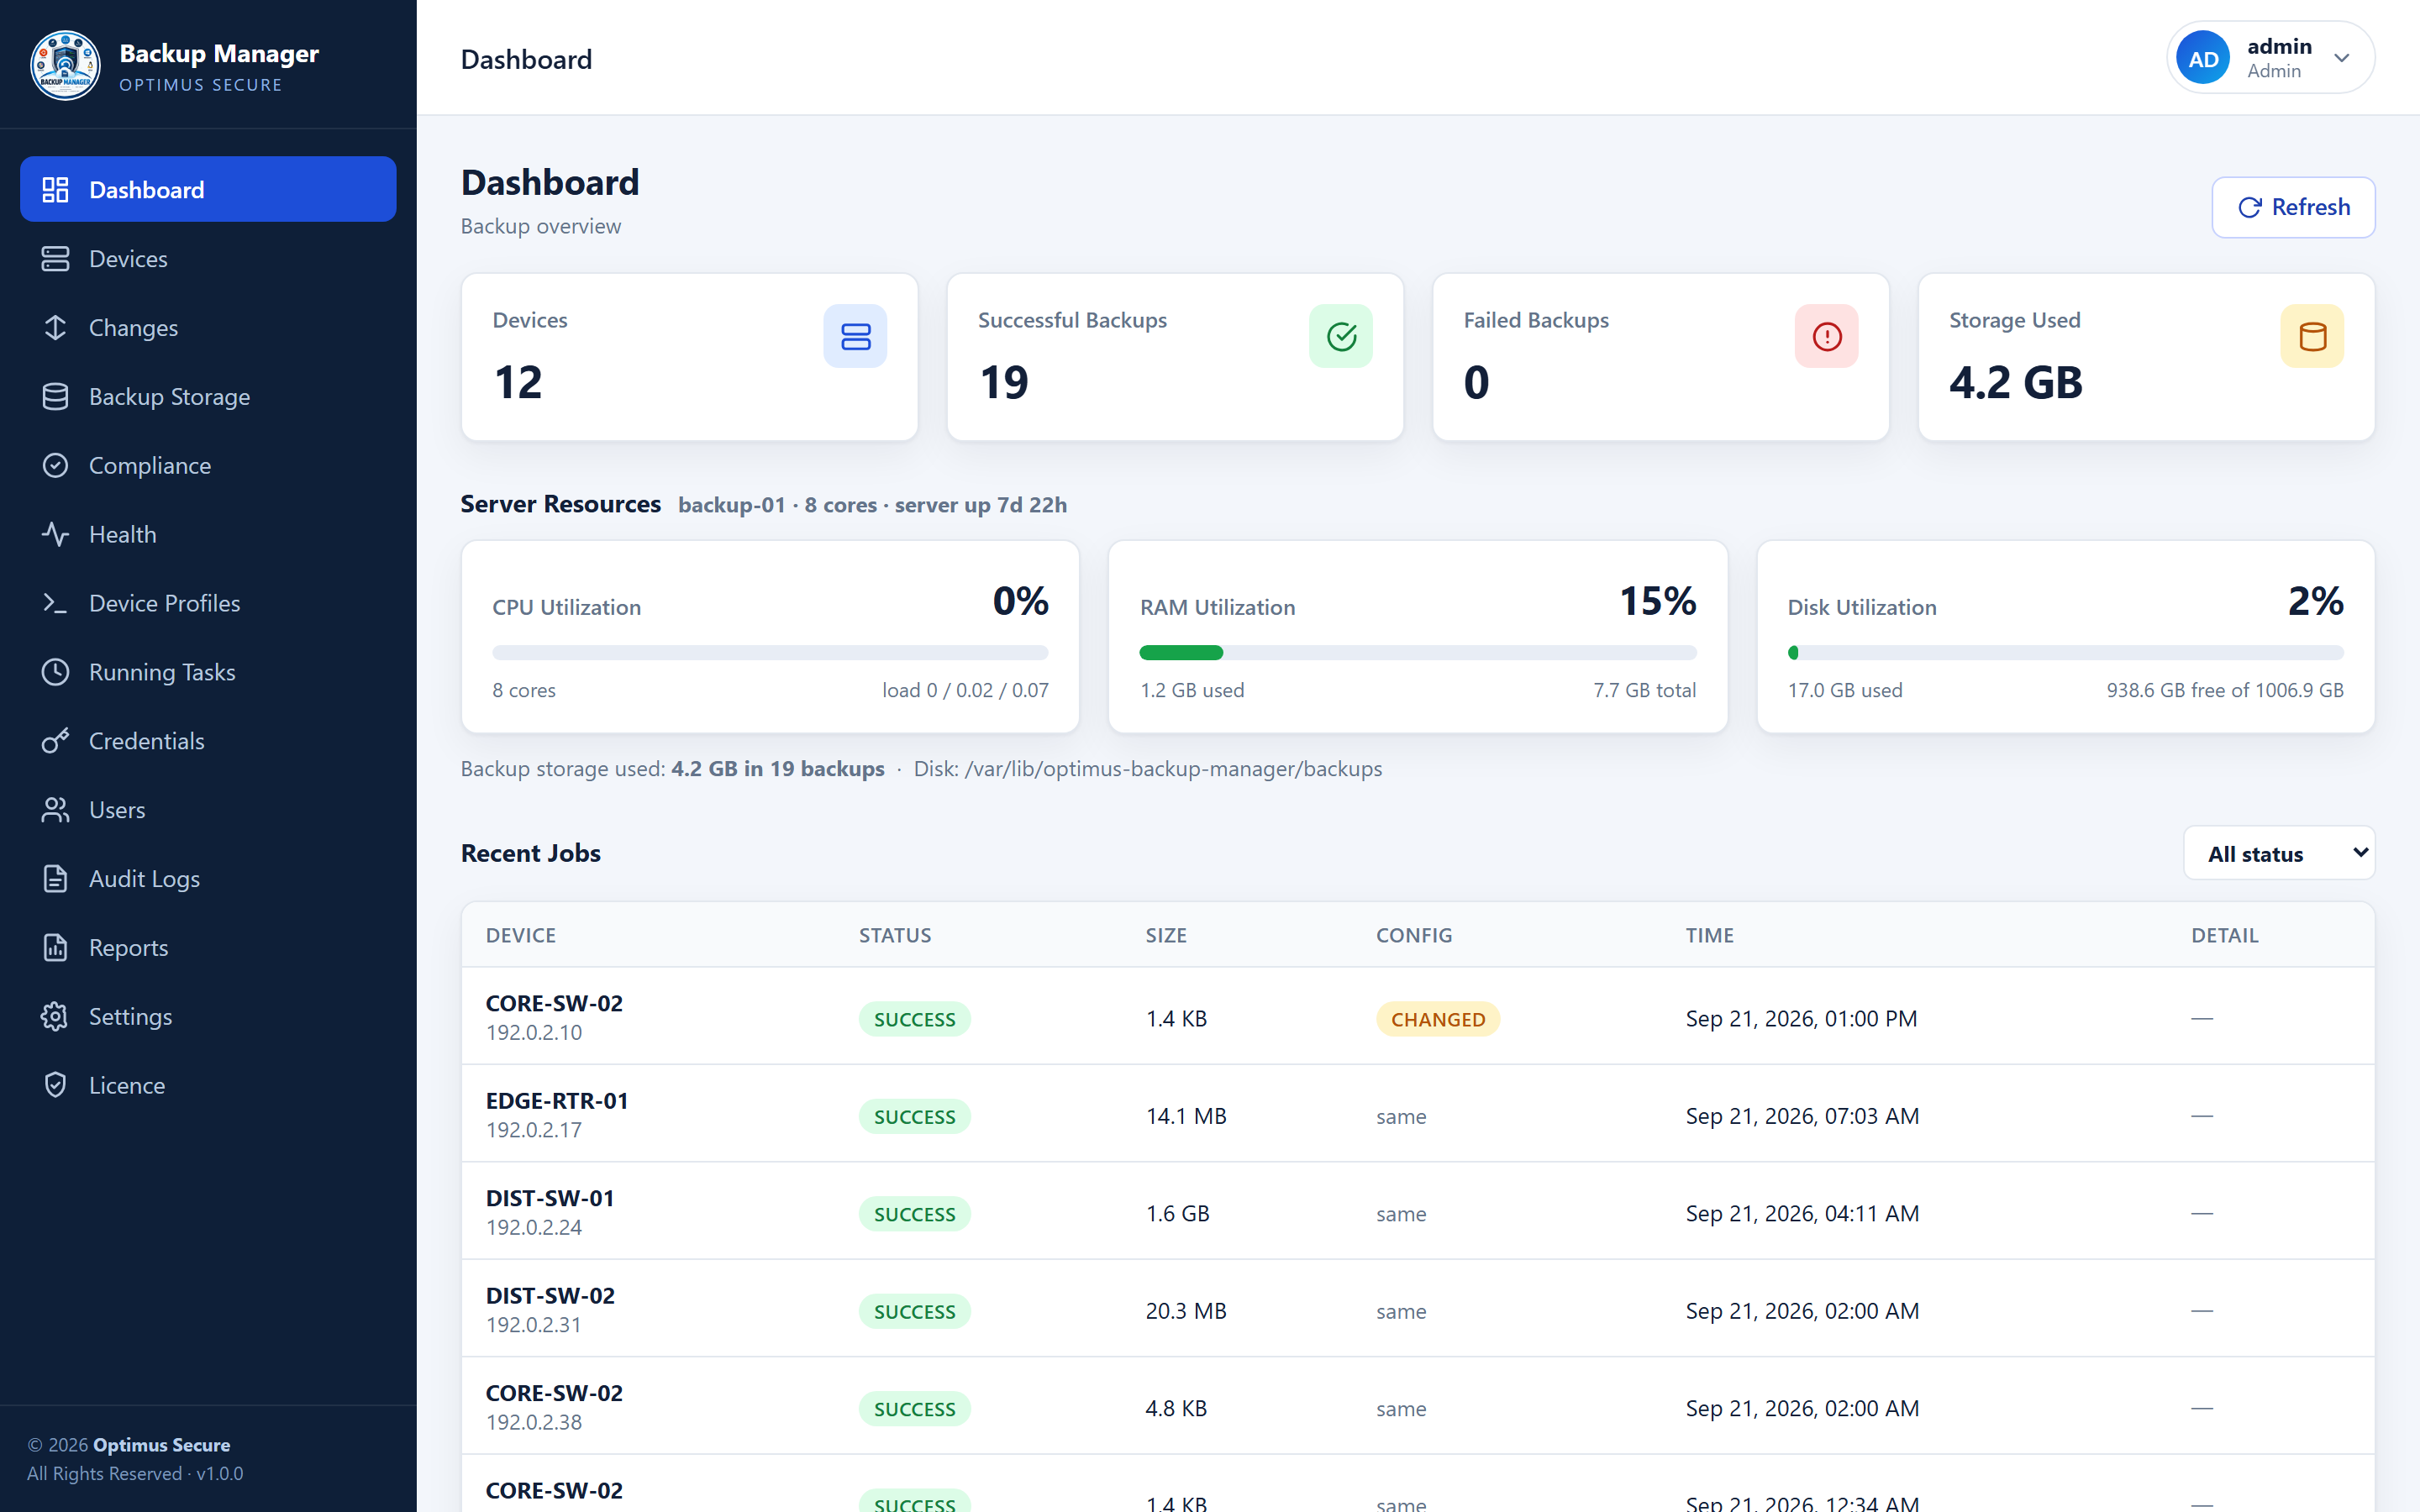
The dashboard — device and backup counts, storage used, server CPU, RAM and disk, and recent jobs.
Before you start
One server and about five minutes. Everything else is installed for you.
| Operating system | Ubuntu 20.04 / 22.04 / 24.04 LTS, Debian 11 / 12, or CentOS / RHEL / Rocky / Alma 8, 9 or 10 |
| CPU and memory | 2 cores and 2 GB RAM is comfortable for a few dozen devices |
| Disk | Depends on what you back up. Network device configs are tiny; a server file tree is not |
| Network | The server needs to reach your devices on SSH (22), Telnet (23) or HTTPS — whichever each device uses |
| Internet | Needed once, to install Node.js and fetch the licence. Air-gapped installs are supported — see Your Licence |
| Node.js, build tools | Not required beforehand — the installer adds whatever is missing |
| Root access | The installer needs sudo |
Install in one command
Copy this into your terminal. It installs everything and starts the service.
Run the command
It works out whether this is an Ubuntu- or CentOS-family system, installs Node.js and any build tools that turn out to be needed, creates a locked-down service account, generates secrets, and registers a systemd service that starts at boot.
Wait for it to report healthy
Two to five minutes on a fresh server, most of it downloading dependencies. The installer checks the service actually answers before it tells you it succeeded — if it does not, it shows you the log rather than claiming success.
Open the dashboard
Browse to the address it prints — http://your-server-ip:3000.
Port 3000 is already in use. Please enter a free port: [3001]Press Enter to take the port it suggests, or type one of your own — it is checked before the install continues, so you cannot pick one that will not work. Add
--yes and it chooses without asking. Either way, the address to open is in the summary at the end.sudo ufw allow 3000/tcp on Ubuntu, or sudo firewall-cmd --permanent --add-port=3000/tcp && sudo firewall-cmd --reload on CentOS.Want a different port or a different place for the data? Pass them in:
What gets installed, and where
Code and data are kept apart on purpose, so updates can be swapped in and rolled back cleanly.
| Configuration | /etc/optimus-backup-manager/backup-manager.env |
| Database and backups | /var/lib/optimus-backup-manager |
| Program files | /opt/optimus/backup-manager/current |
| Service | systemctl status backup-manager |
| Logs | journalctl -u backup-manager -f |
| Update command | sudo backup-manager-update |
First login
One account exists to begin with. Change its password before you do anything else.
| Address | http://your-server-ip:3000 |
| Username | admin |
| Password | admin123 |
Once you are in, go to Settings and set the password policy, session timeout and login lockout to whatever your organisation requires.
Your licence
A fresh installation licenses itself for 15 days. There is no key to type in.
When the service first starts it contacts the Optimus Secure licence server and is issued a 15-day trial. The clock starts then, not when the licence was created, so a trial is always a full trial. The Licence page in the sidebar shows what you have and how long is left.
To continue past the trial, talk to us and we will extend the term. You do not have to do anything on your server — the installation picks up the new term on its next check, within a few hours. You can force it immediately with Check now on the Licence page.
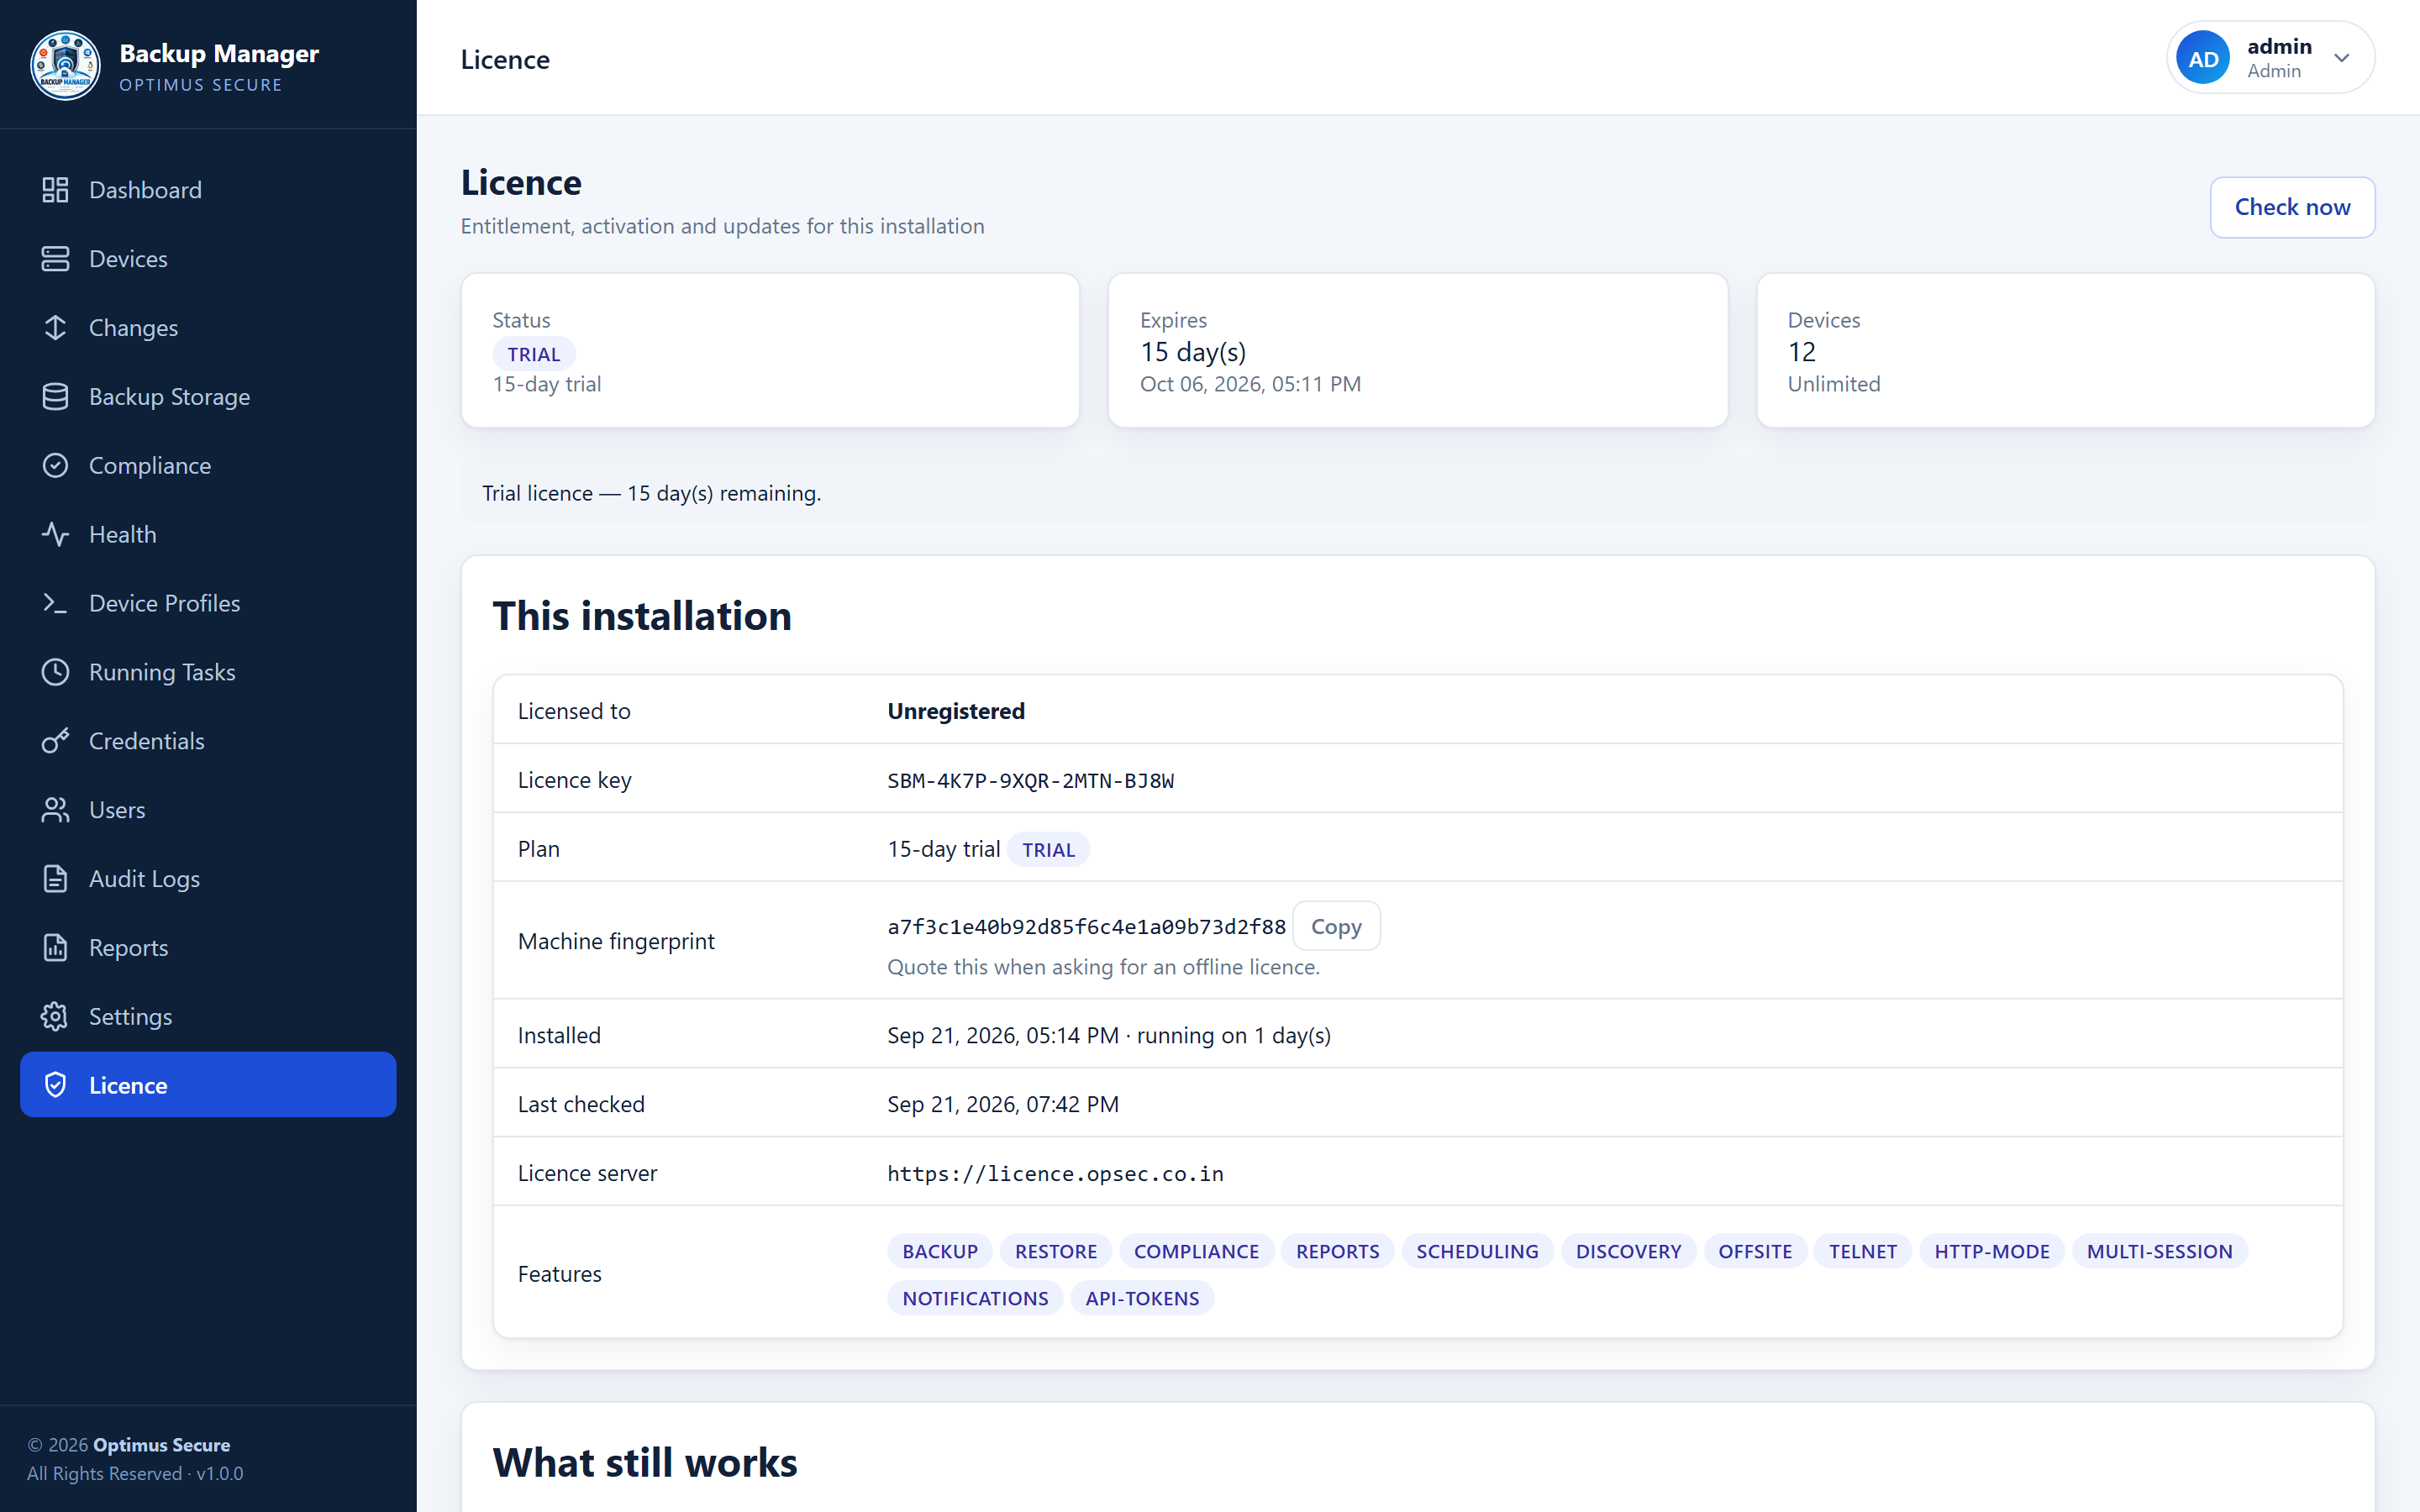
The Licence page — plan, expiry, device usage, machine fingerprint and what is available.
No internet on this server? Open the Licence page, copy the machine fingerprint and send it to us. We will send back a signed licence file that you paste under Offline activation. It is tied to that one machine and needs no network at all, ever.
Store your credentials once
Most networks use the same few logins across many devices. Save them once and reuse them.
Go to Credentials and add each login you use — a username with a password, or an SSH private key with its passphrase, plus an enable password where the device needs one. Everything is encrypted before it is written to disk.
When you add a device you can then just pick a saved credential instead of typing it again. Changing a password later means editing it in one place rather than on forty devices.
Adding your first device
Test the connection before you trust the schedule.
Open Devices and choose Add Device
Give it a name you will recognise later, its address, and the port if it is not the default.
Pick how it should be reached
Choose a saved credential, or enter a username and password here. For older equipment, turn on legacy algorithms so the connection negotiates the way PuTTY would.
Choose a backup mode
See Backup Modes below. For a switch or router, a device profile is almost always the right answer.
Use Test Connection
This logs in and reports what it found without saving anything. Fix any problem now rather than discovering it at 2am.
Save, then Backup Now
Run one manual backup and check the result under Backup Storage before you rely on the schedule.
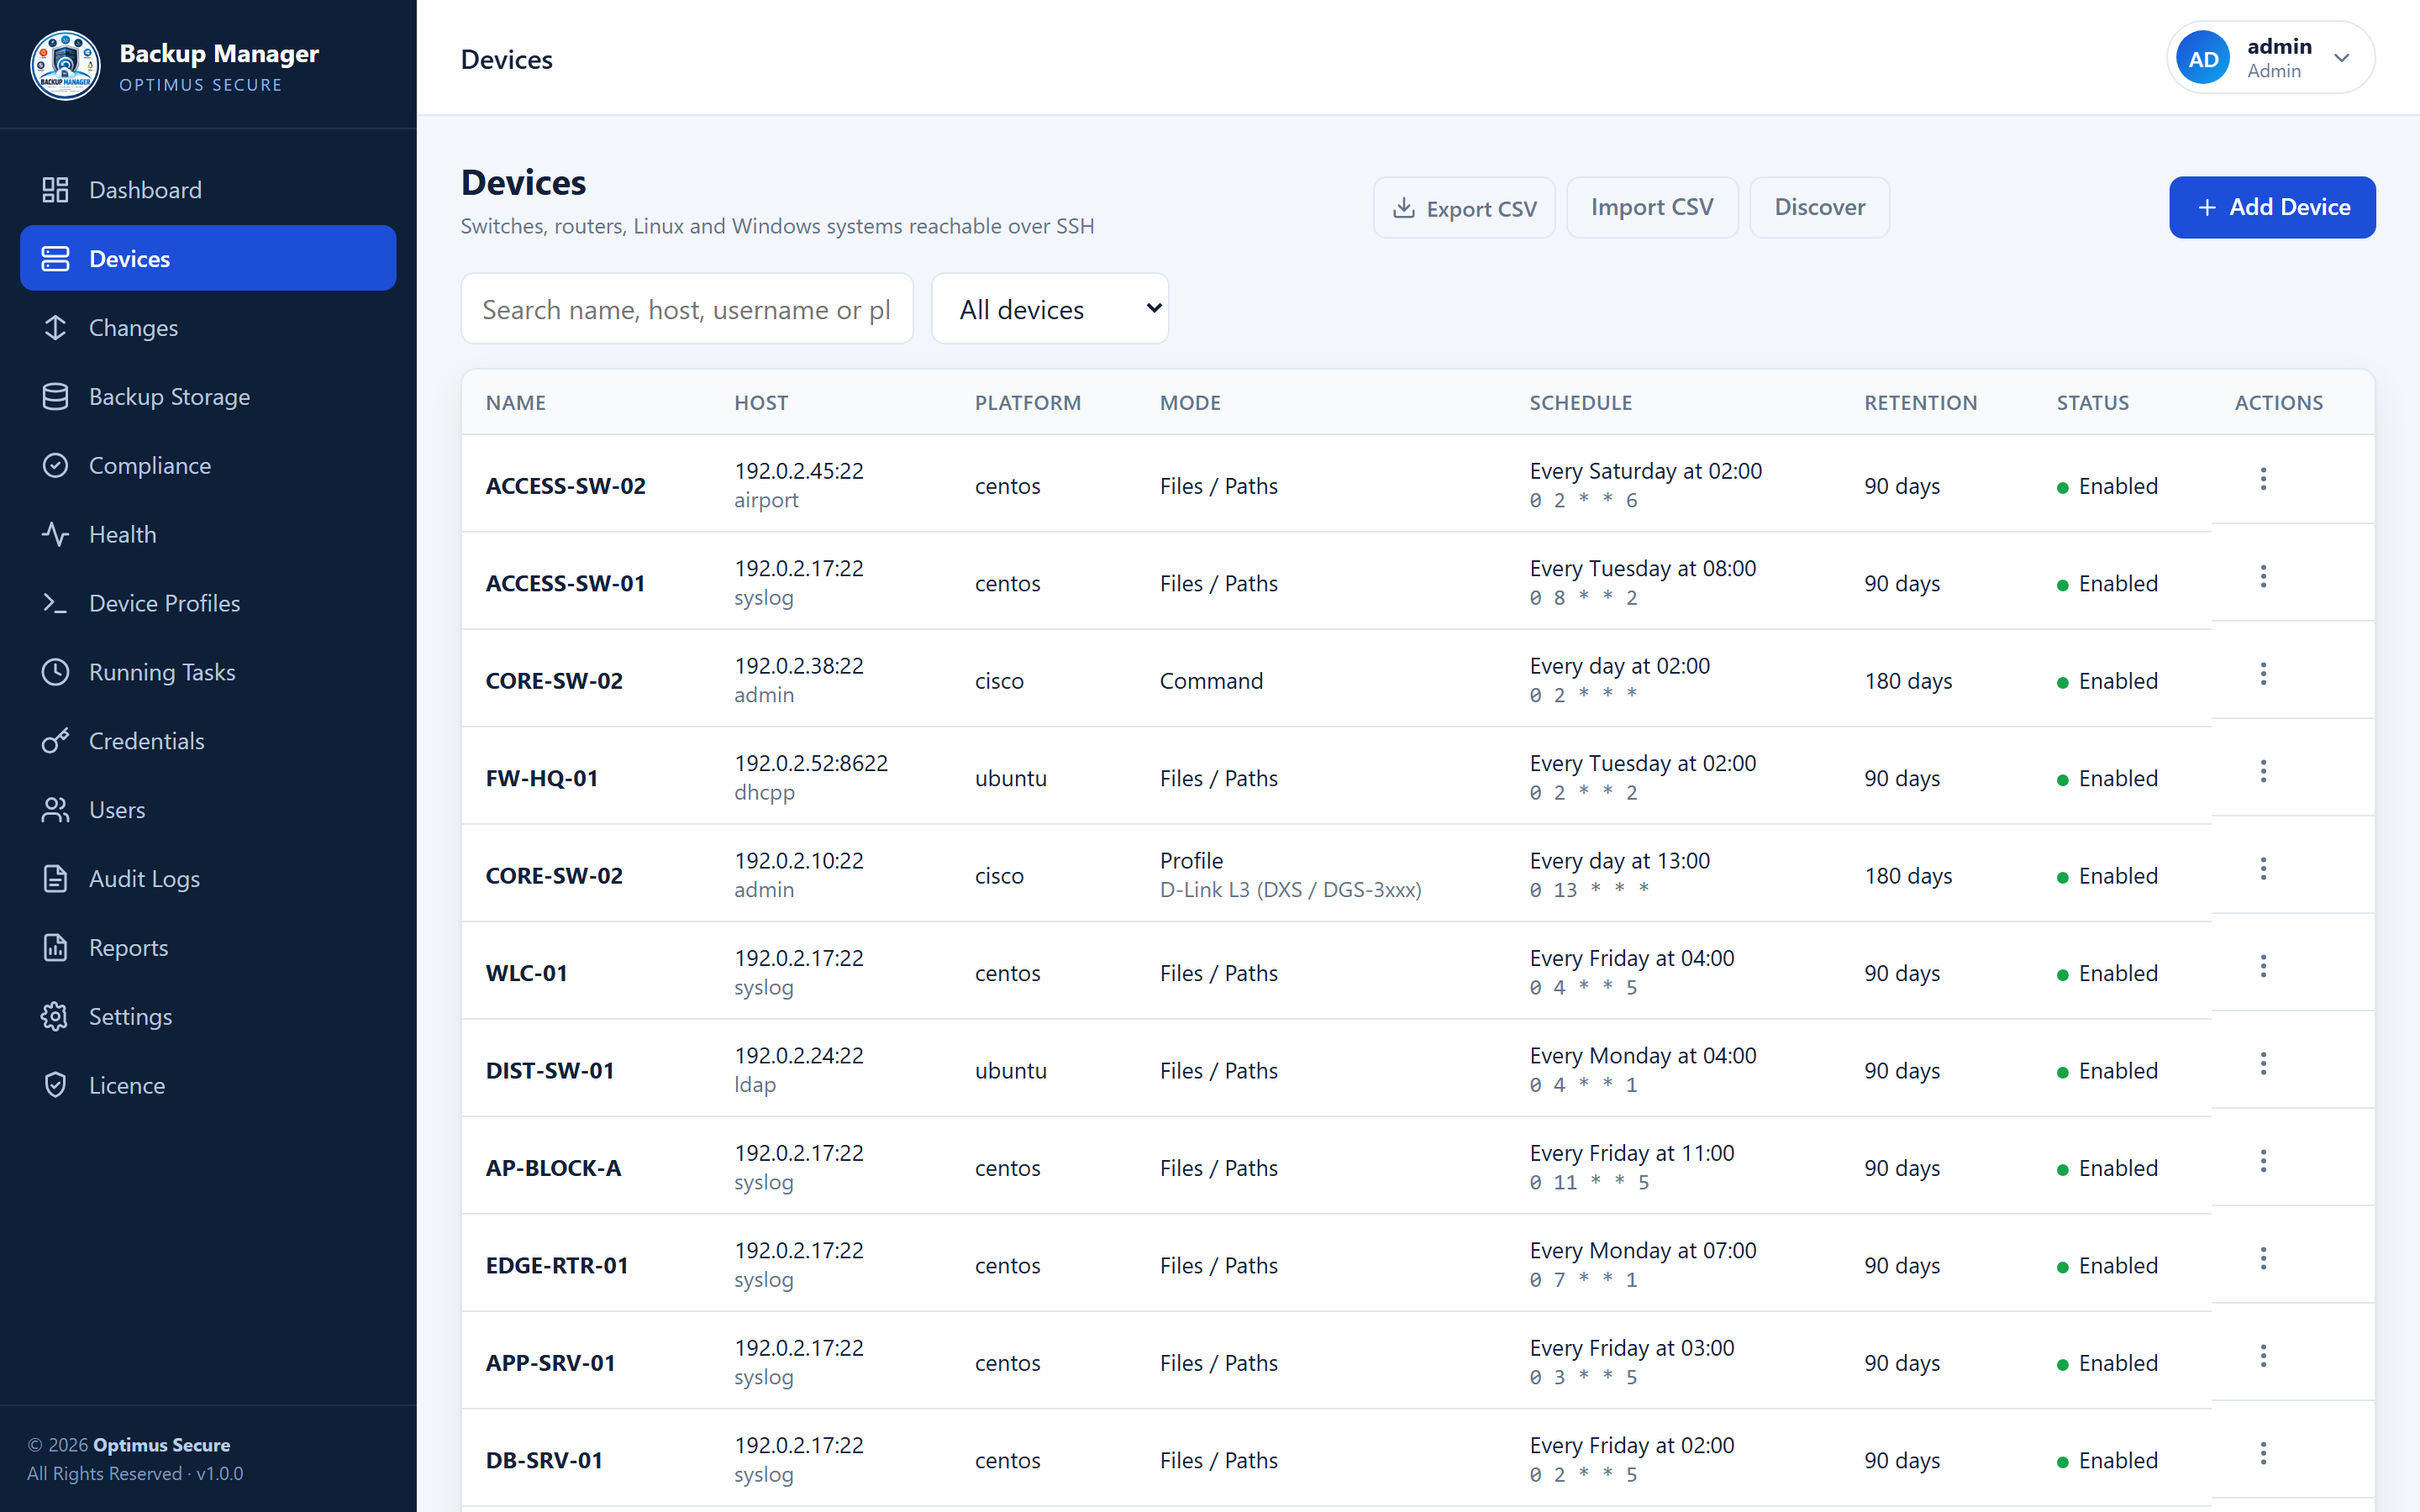
The Devices page — every device with its host, platform, mode, schedule and retention.
Adding many devices
Scan the subnet, tick what you want, add it.
On Devices, press
Discover and give it a subnet in CIDR form, for example
172.26.10.0/24. It checks TCP 22, 23, 443 and 80 on every
address and lists what answered, with the SSH banner where there is one. A /24 takes about a
minute. Anything already in Backup Manager is marked already added so it
cannot go in twice.
Choosing what to add
Tick the ones you want, or press Select all new and untick the few you do not. Every row also has Add this one: that opens the ordinary Add Device form with the address already filled in, so a single device gets every option that form has.
Adding a batch offers the same settings — platform, what to back up (including HTTP), exclude patterns, the enable password, schedule, retention, parallel sessions, tags, and whether they start enabled or paused.
One login for the lot
A rack of switches usually shares one account, so the form asks how to log in before anything else:
| Use a saved credential set | Pick one that already exists. Every device added points at it. |
| Create a new credential set | Name it, give the username and password, and it is created as you add. Changing that password later updates every device using it, which is the reason to prefer this over typing the login onto each device. |
| Just for these | A username and password stored on the devices themselves, with no shared set. |
Choosing a saved set takes the username and password fields away and tells you which account it will use — the set supplies the login, so there is nothing to type. Everything else can be changed per device afterwards.
Naming the kind of device
The Platform list is a label used for grouping and for reading the device list, and it is not fixed. Choose + Add a platform… in any platform list, give it a name, and it is there from then on — for the switch vendor, appliance or box that is not in the list as shipped.
Manage the ones I added… in the same list removes them again. The names that came with Backup Manager stay, and one still in use by a device is kept until those devices are changed.
There is also Import CSV next to Discover, for when the list comes from somewhere else.
Backup modes — which one to use
Four ways to get a configuration off a device. Pick by what the device is.
| Device profile | For switches, routers, firewalls and wireless controllers. Runs a known command sequence — log in, enable, disable the pager, show the running config. This is the right choice for nearly all network equipment. |
| Paths | For Linux and Windows servers. Copies the directories you name over SFTP into a ZIP archive. Use the tree picker to choose exactly what to include and skip the parts you do not need. |
| Command | For anything with a one-off command that prints what you want, such as a custom export script. |
| HTTP/HTTPS | For firewalls and appliances with a config-export endpoint — FortiGate, Palo Alto, Sophos, pfSense and similar. Supports basic auth, bearer tokens, API keys and form logins. |
node_modules can turn a twenty-minute job into a two-minute one. Large trees are pulled over several SSH sessions at once, which you can tune per device.Device profiles
Command sequences for common equipment, and a way to write your own.
Profiles for Cisco IOS, Juniper, Aruba, MikroTik, D-Link, Sophos, Cambium and Ruckus are built in. Each one knows how to log in, get to enable mode, turn off the --More-- pager and print the configuration.
If your device is not covered, open Device Profiles and build one: add each step as a command with the prompt to wait for. You can copy an existing profile and adjust it, which is usually quicker than starting from nothing.
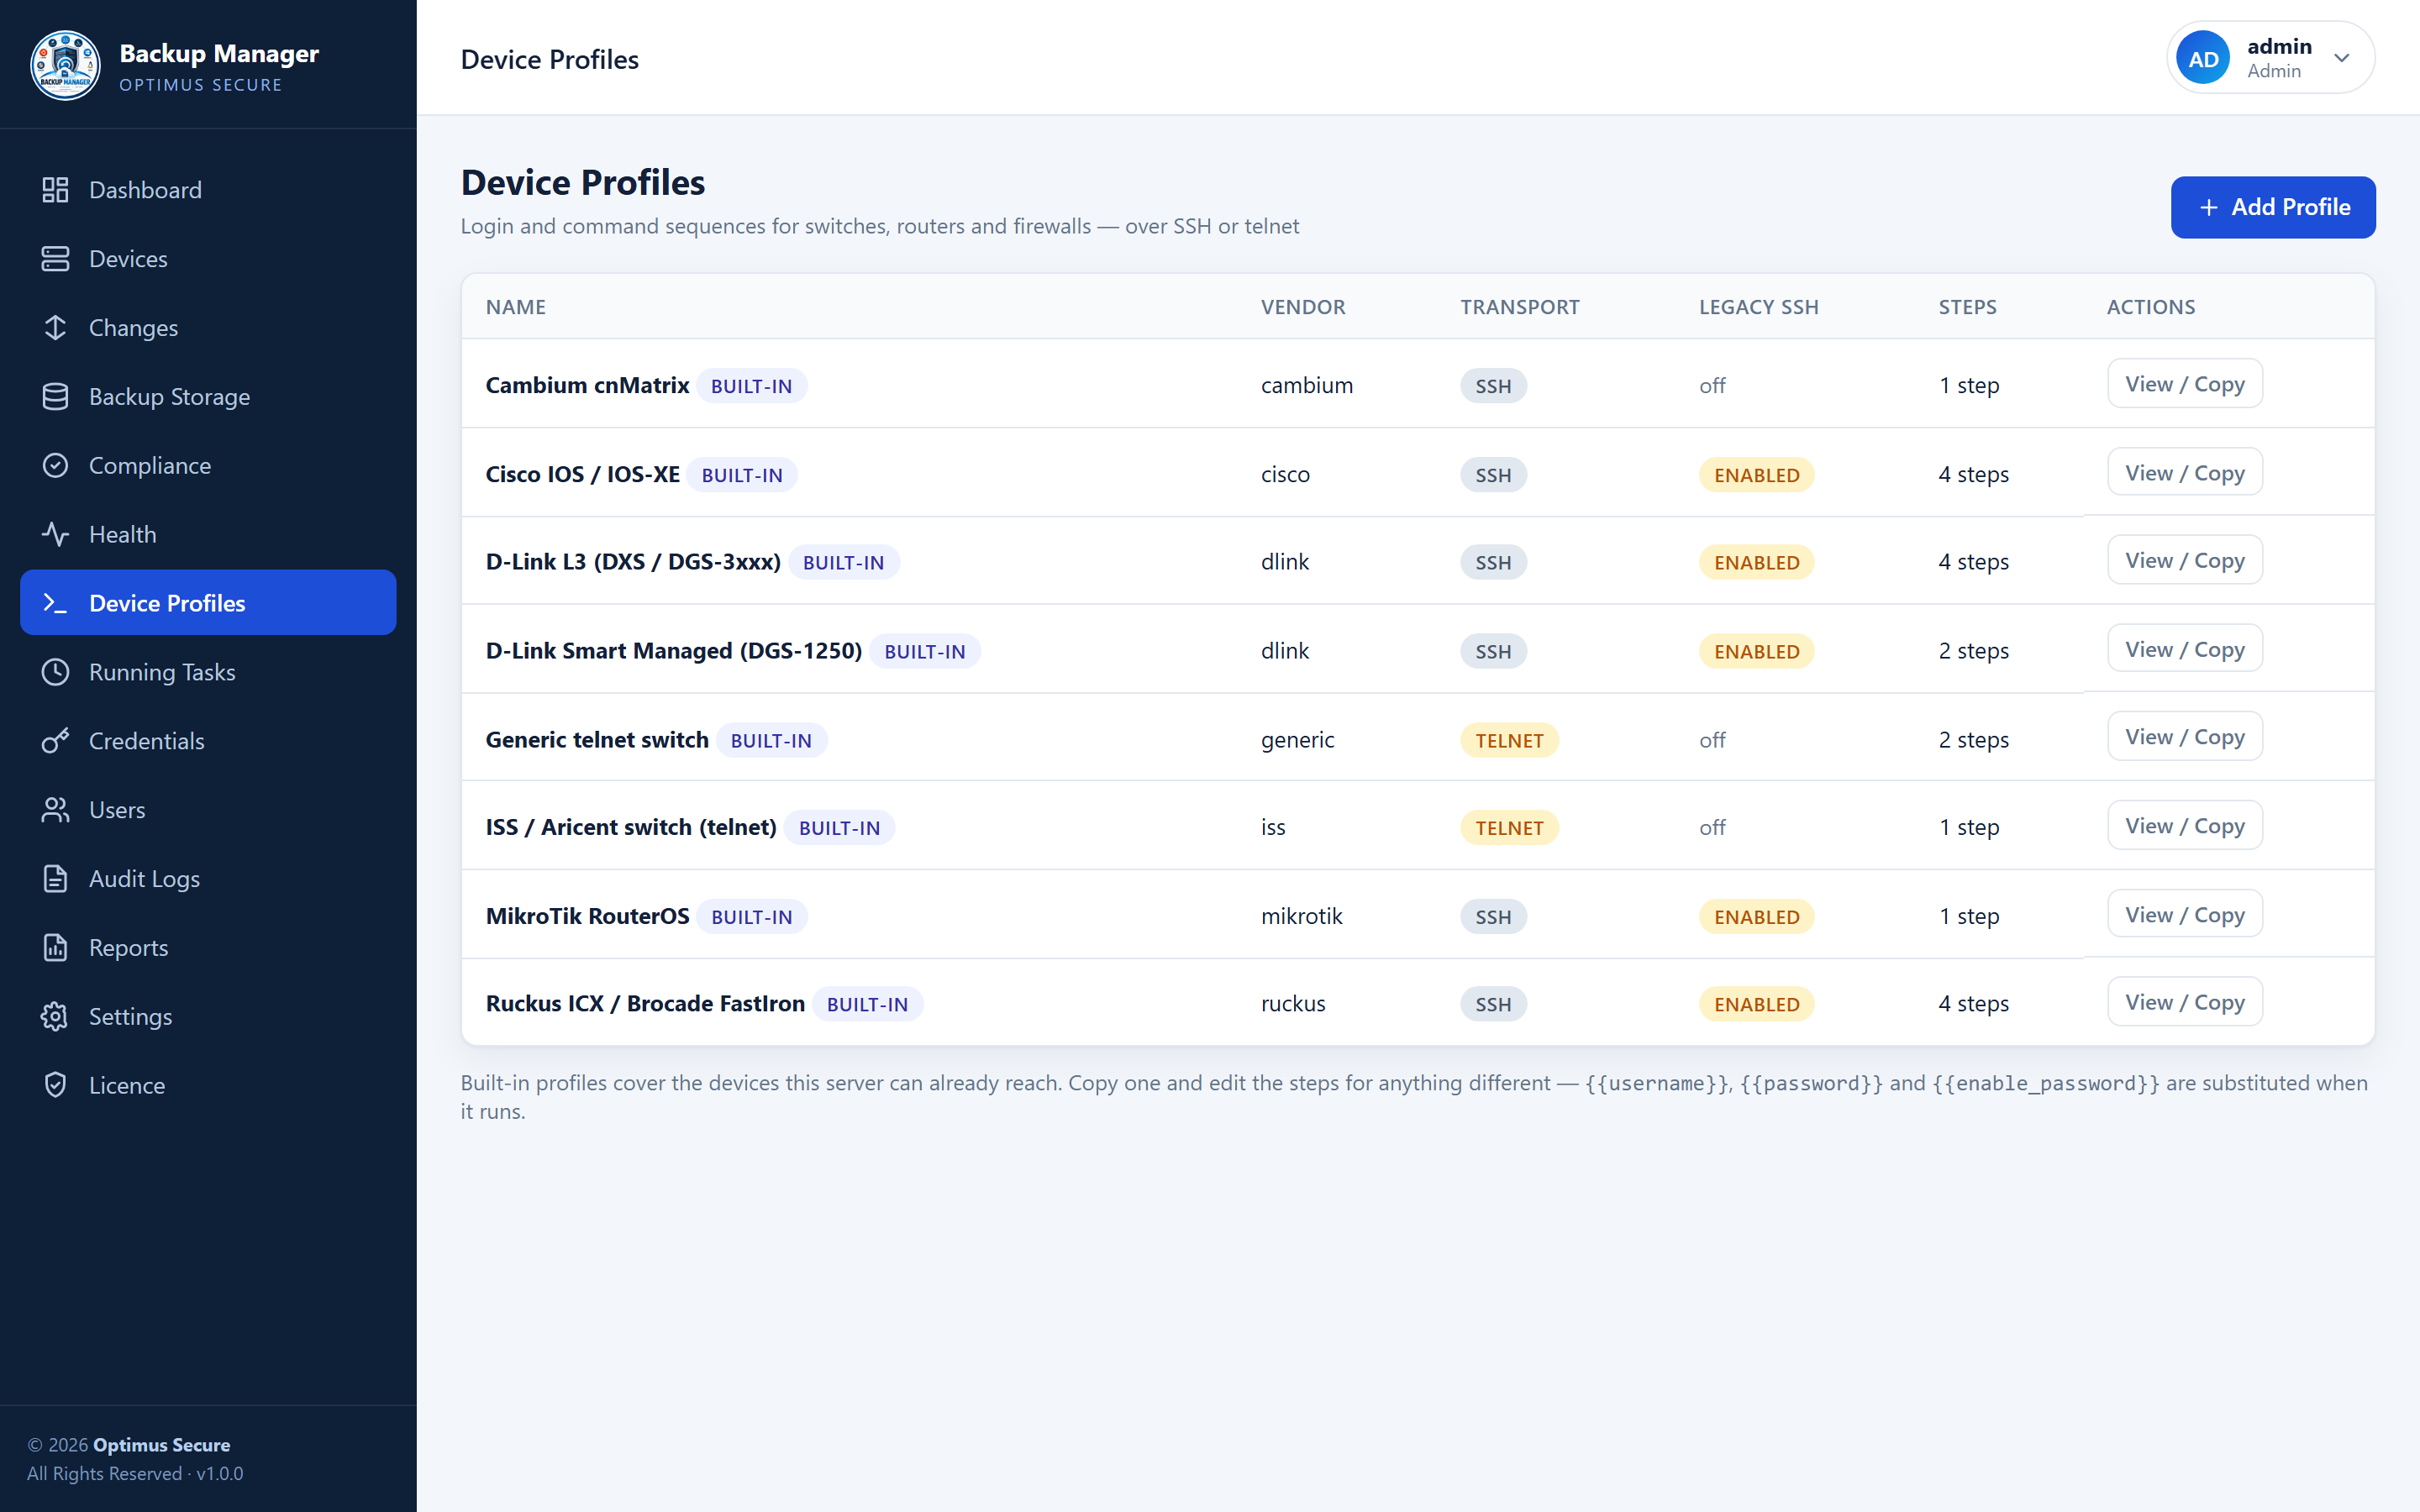
Device Profiles — built-in command sequences, and your own alongside them.
Schedules
Pick a time per device. They stagger themselves so the network is not hit all at once.
Each device has its own schedule, chosen from a time picker rather than written as a cron expression. Give different devices different times — or give them the same time and let the built-in stagger spread them out, so forty switches do not all get hit on the same second.
A job that fails retries on its own, with a growing gap between attempts. Jobs that are queued or running appear under Running Tasks with a live percentage, so you can watch a large copy progress instead of wondering whether it has hung.
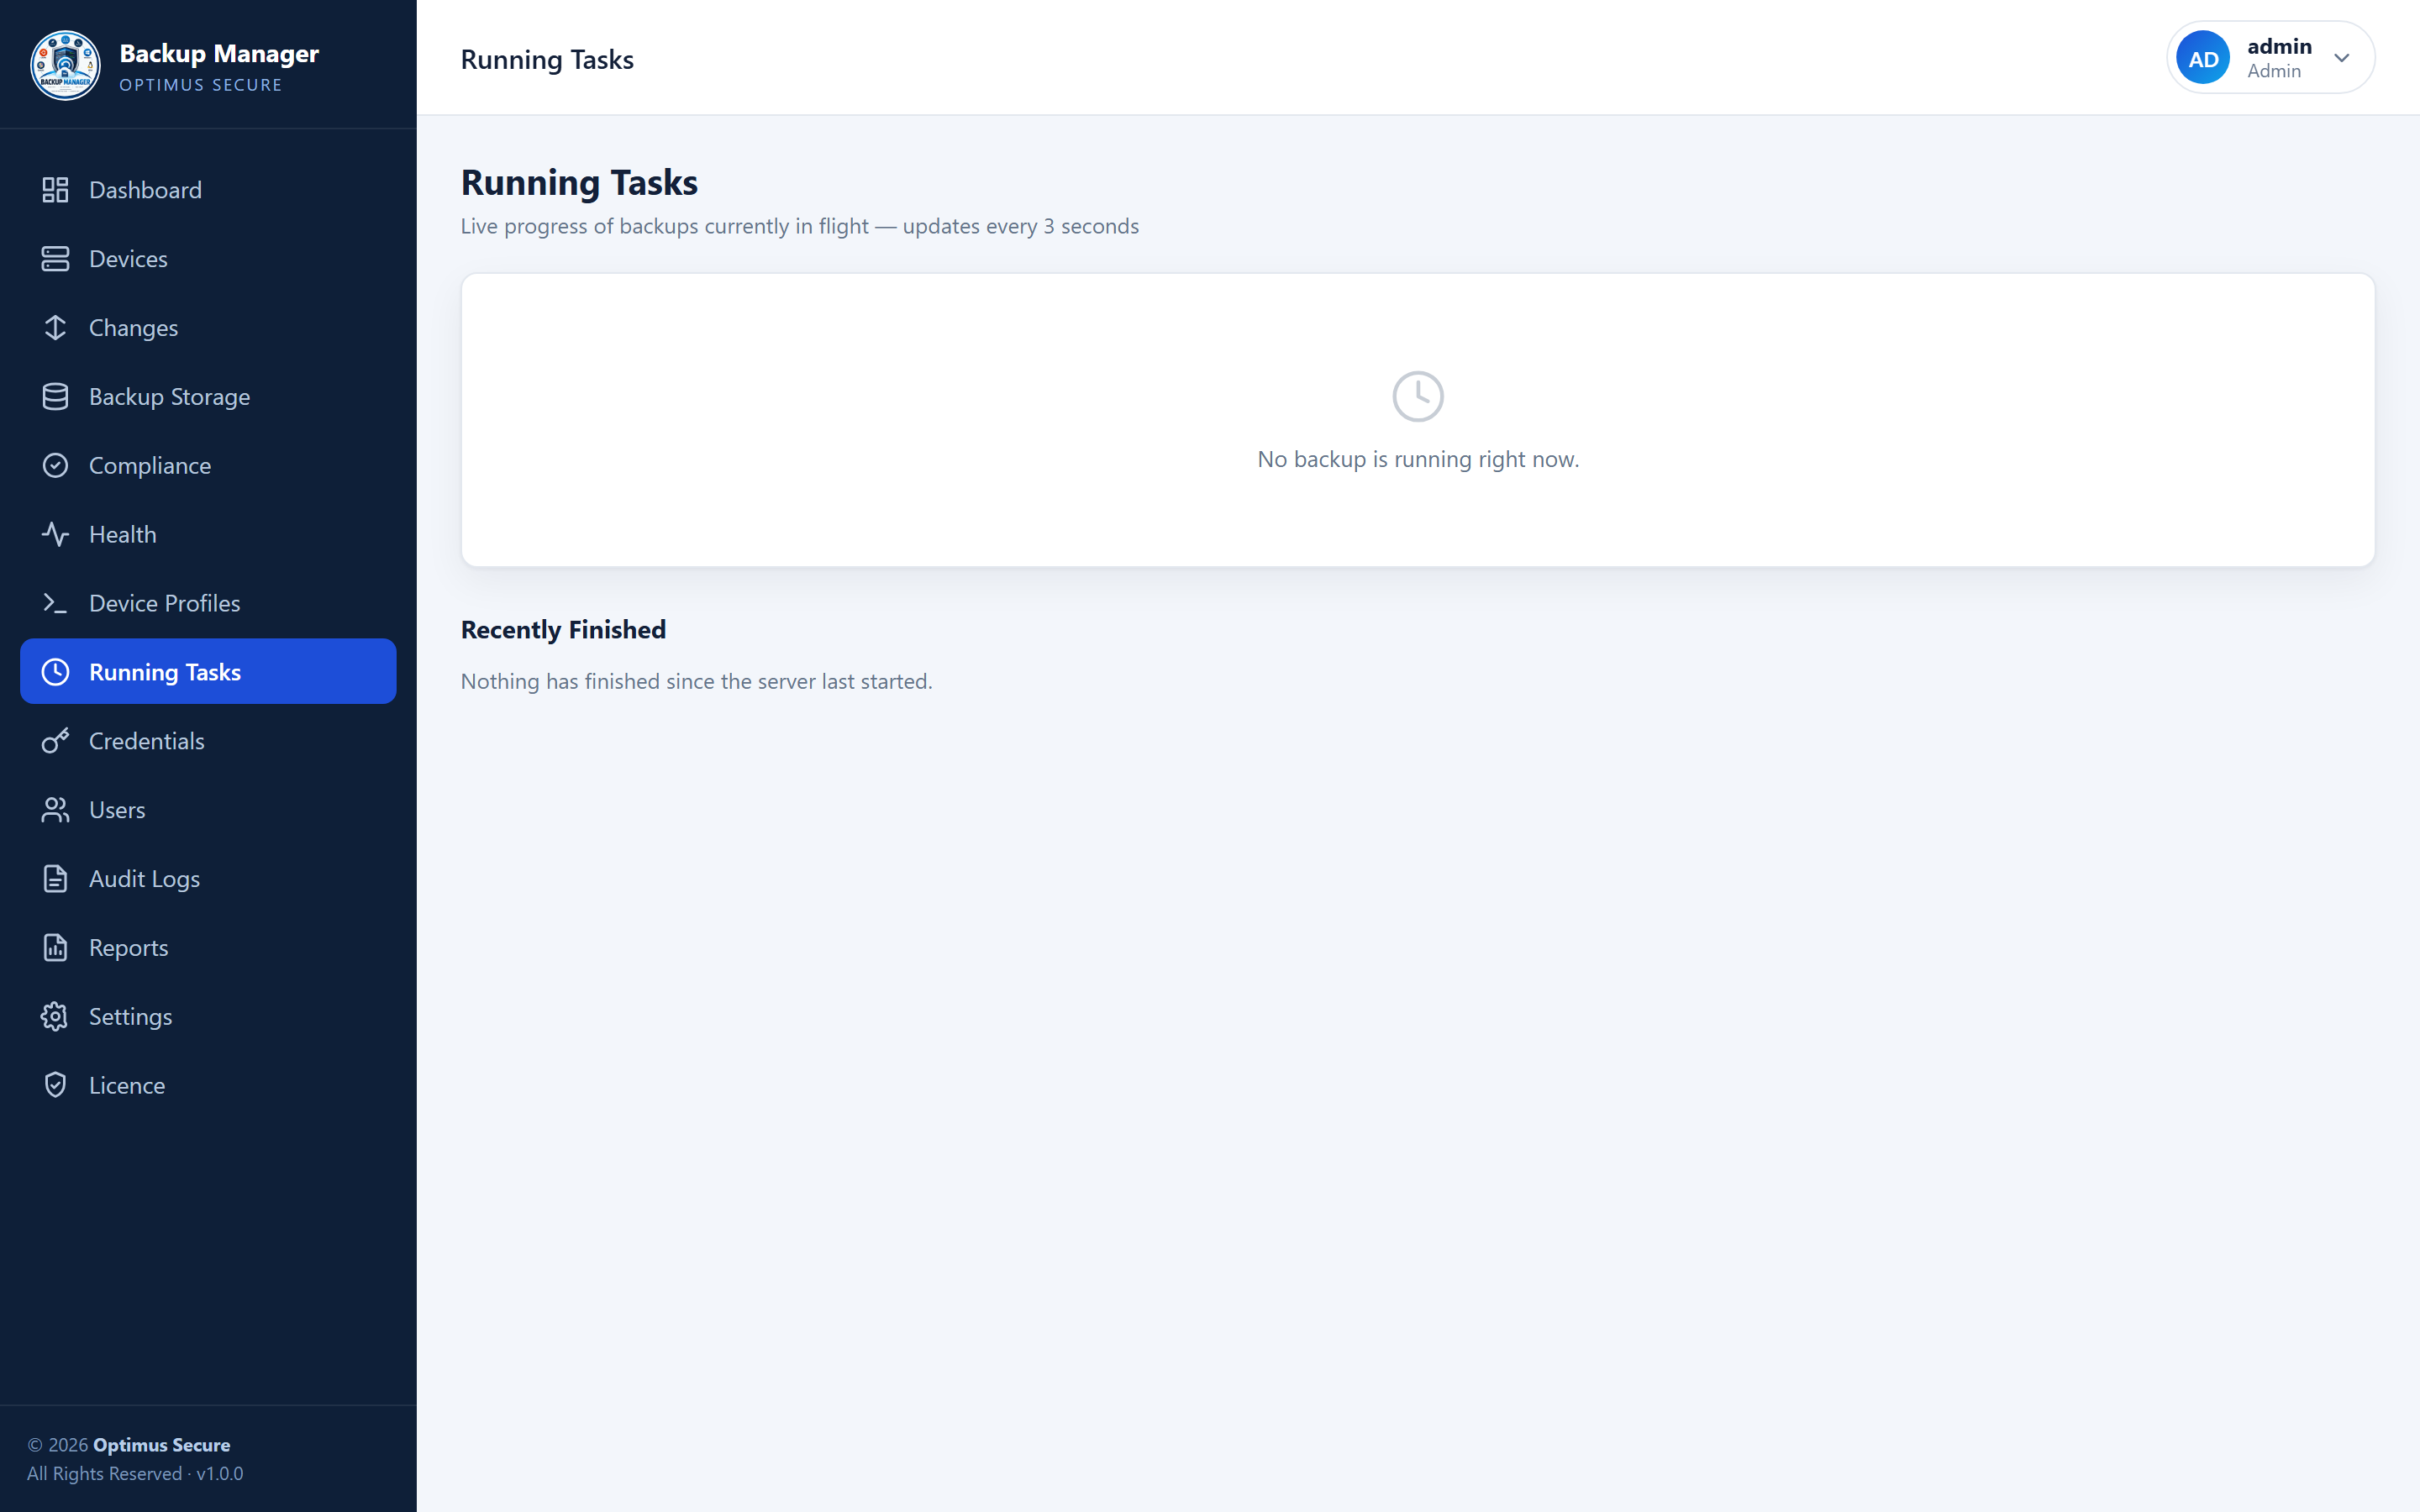
Running Tasks — what is queued, what is running, and how far along it is.
Changes and version history
The question this product exists to answer: what changed, where, and when.
Every capture is compared with the one before it. If the configuration is identical, the existing version is marked as seen again. If it differs, a new version is stored and the device appears on the Changes page with the number of lines added and removed.
Open any change to see a line-by-line diff. Open any device to walk back through its full history and compare any two versions — last night against last month, or before and after a maintenance window.
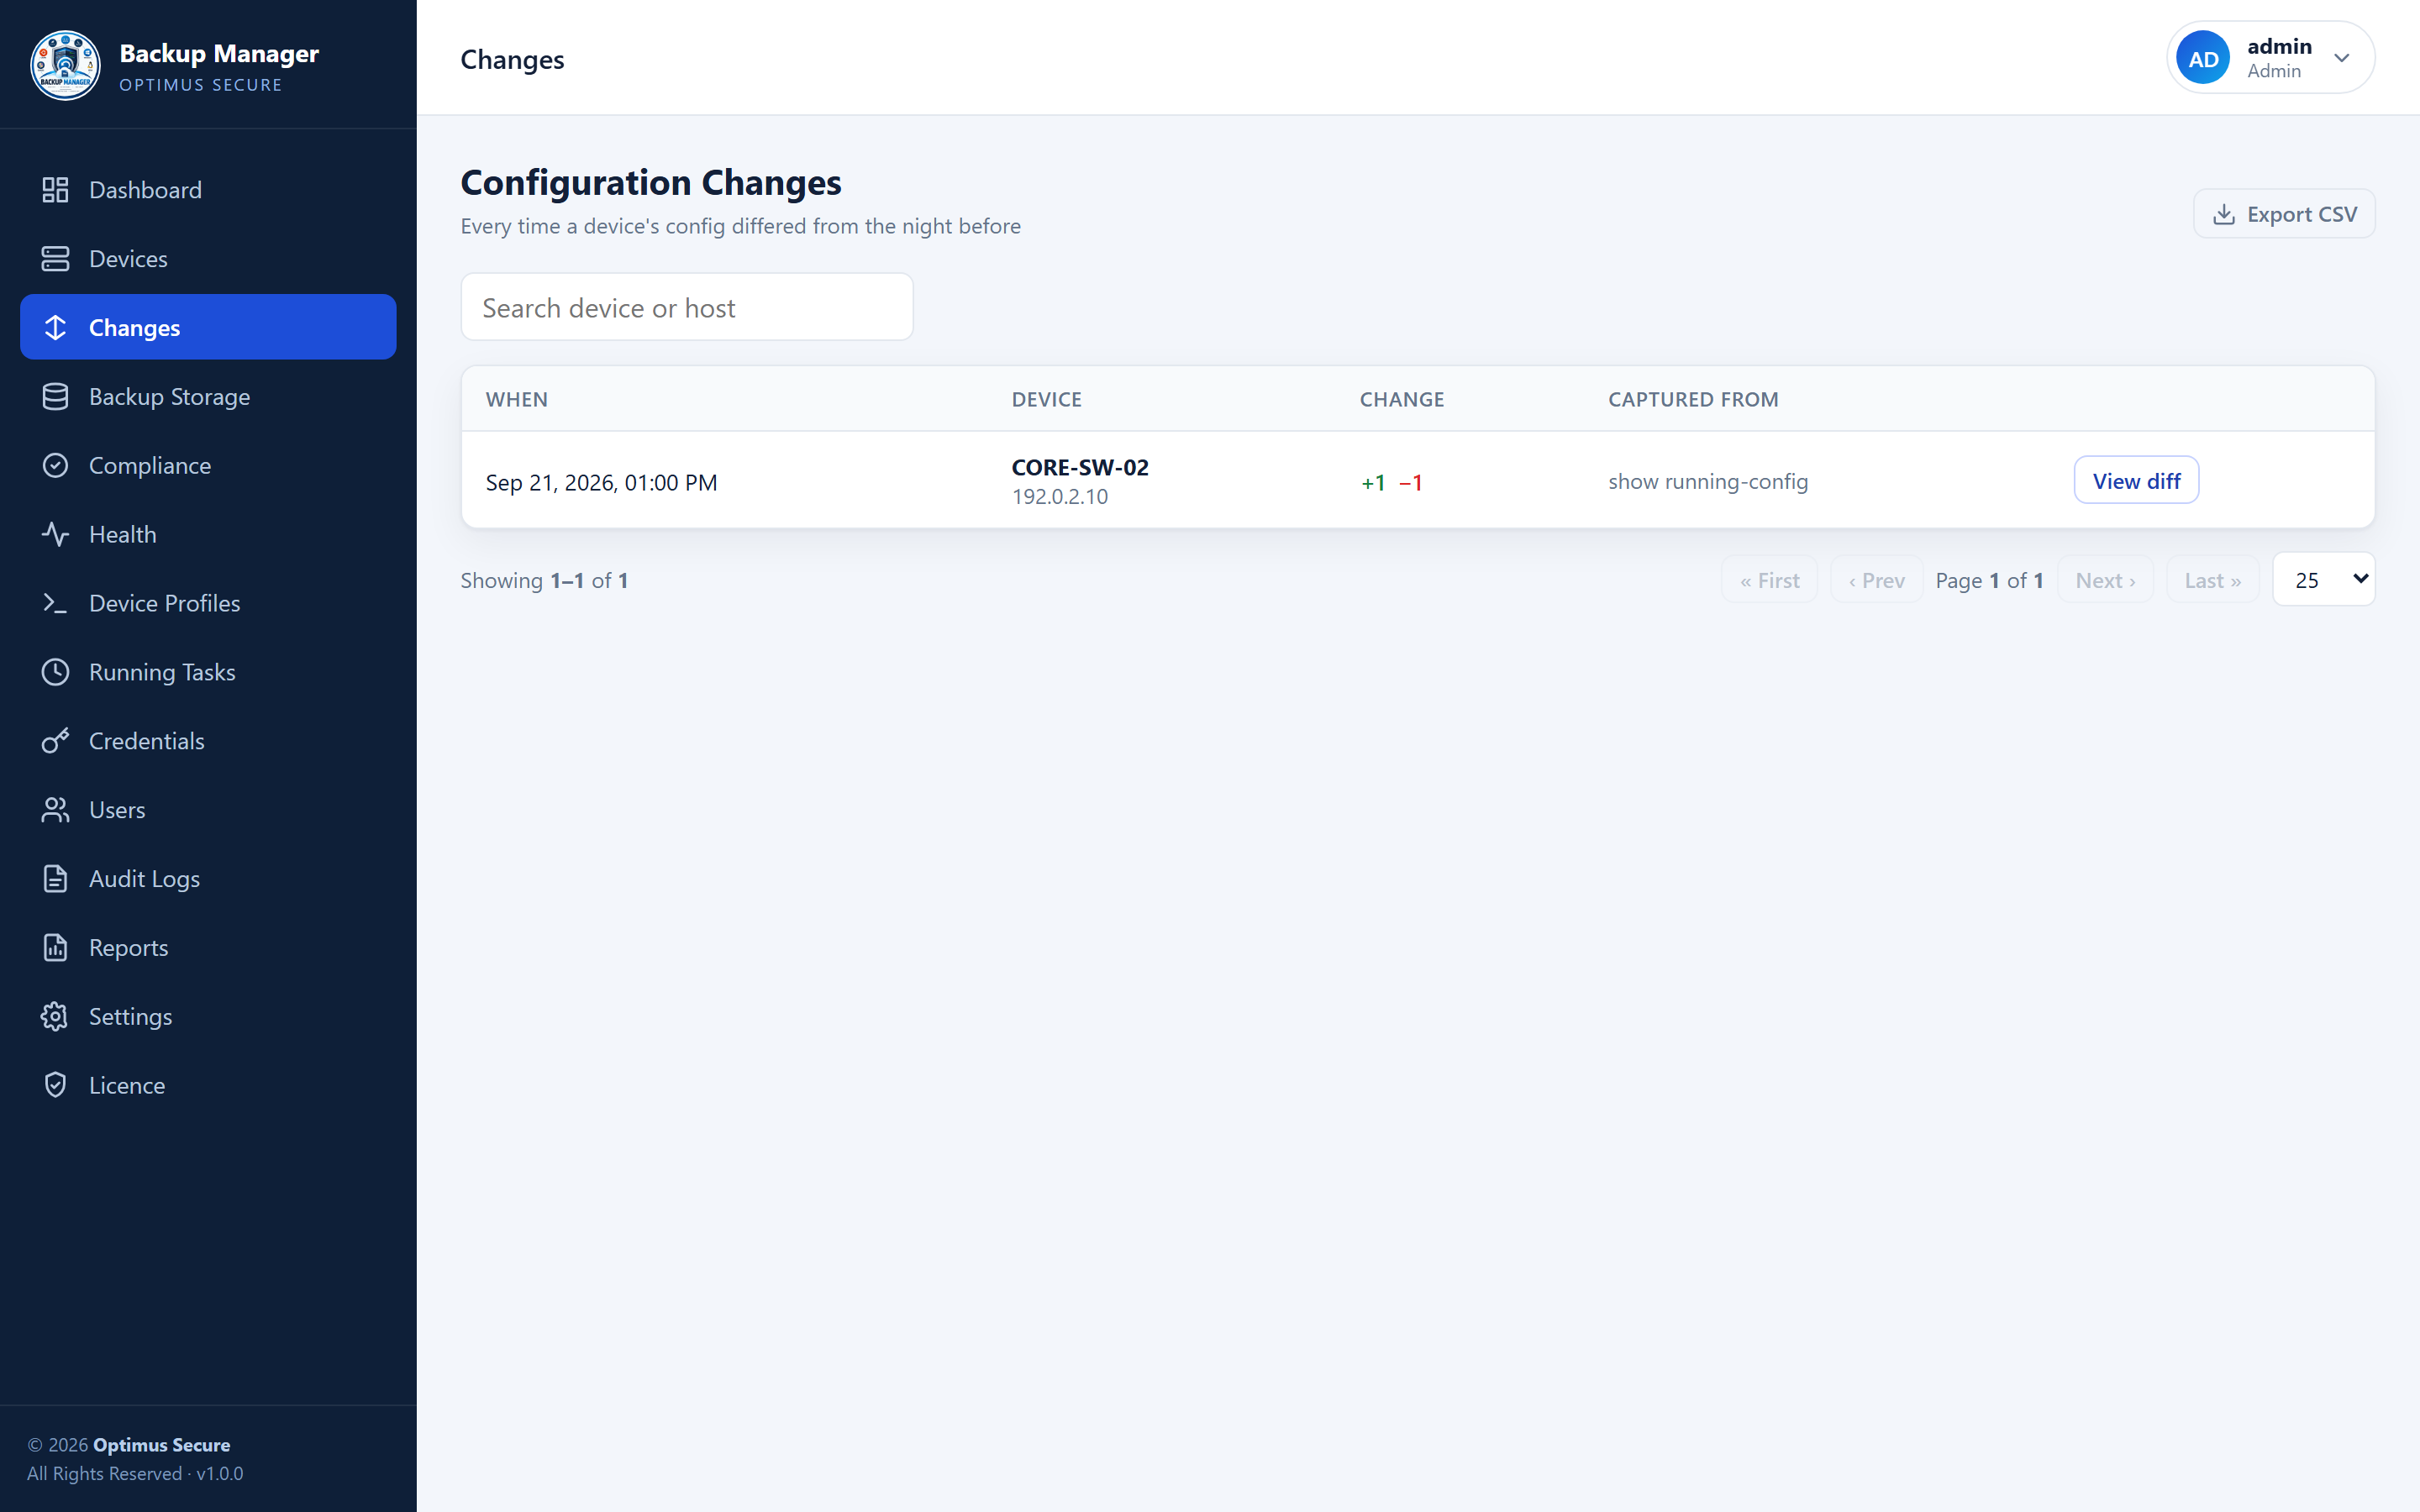
Configuration Changes — which devices changed, when, and how much.
Compliance rules
Check stored configurations against the standards you are supposed to be meeting.
Rules are patterns that a configuration must or must not contain — telnet still enabled, no AAA configured, SNMP using a default community string, logging not pointed anywhere. A set of sensible rules ships with the product and you can add your own with a severity.
Run the check across every device, against a single device, or against one specific stored configuration. That last one lets you answer "was this device compliant in March?" — and because it is a look back at history, the result is shown but not saved, so the dashboard keeps reflecting how things stand today.
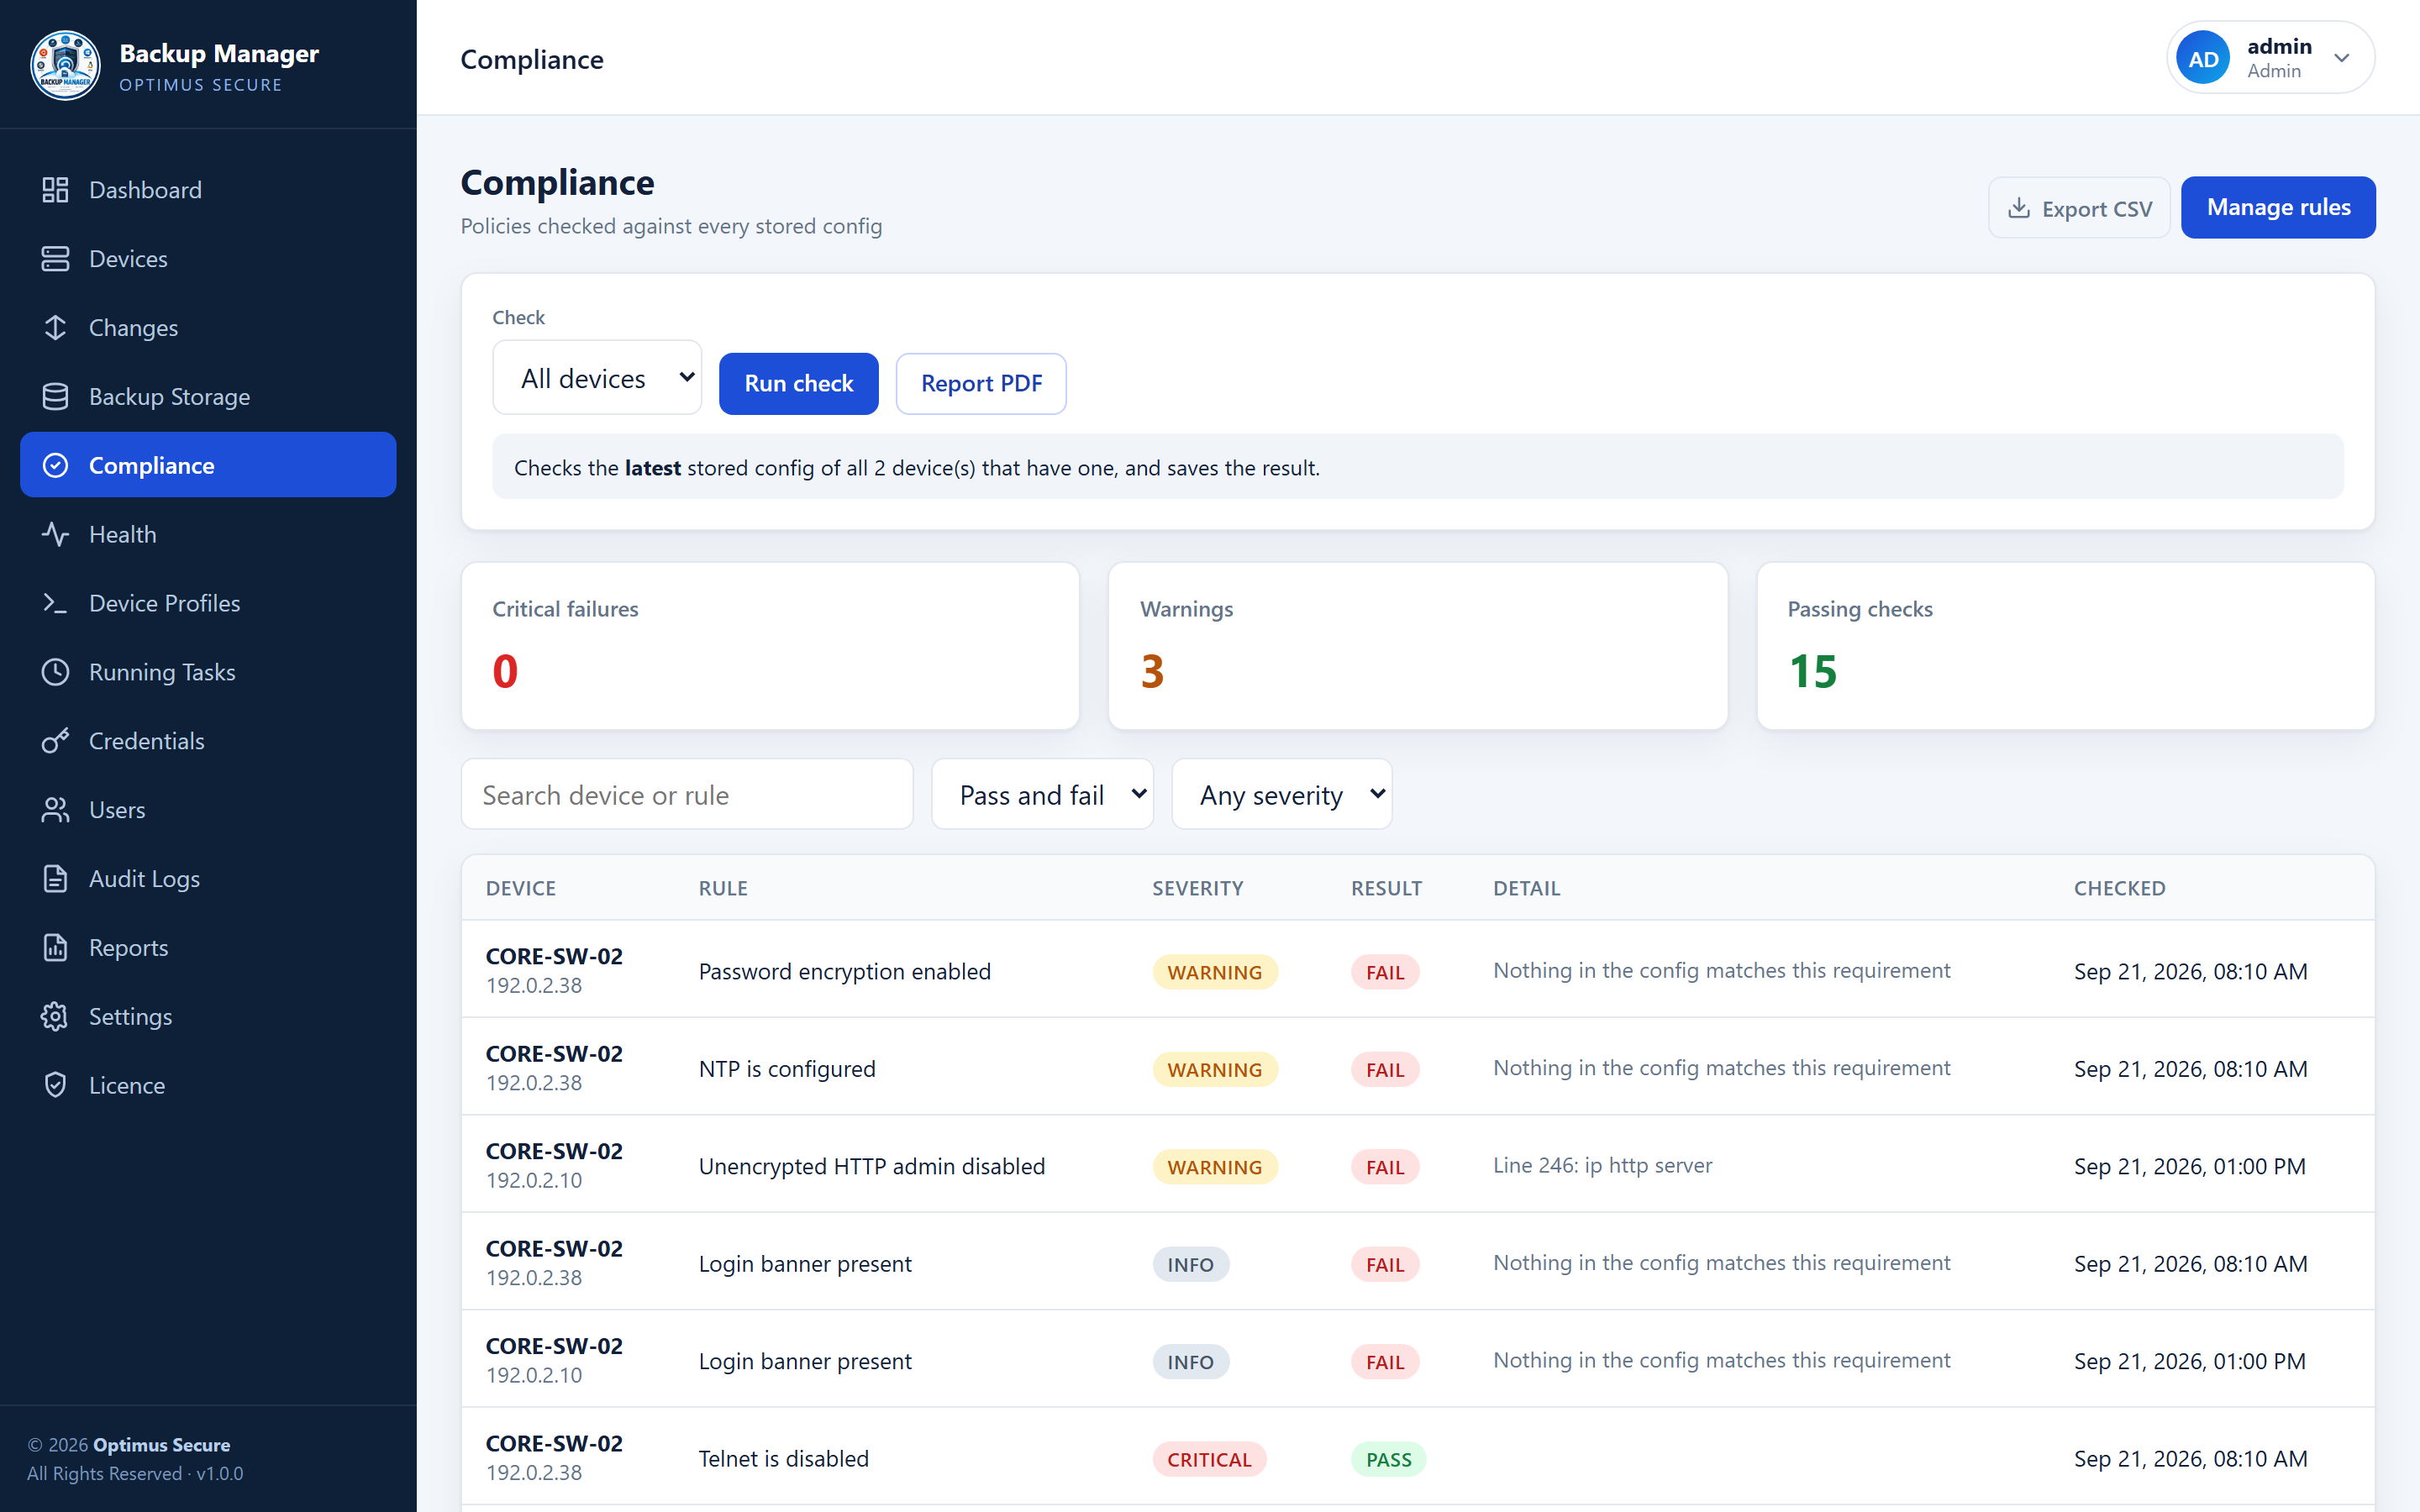
Compliance — rule results per device, with the exact line that failed.
Stored backups
Everything collected, searchable, with the configuration readable in place.
Backup Storage lists every archive with its size, status and when it finished. For network devices you can read the captured configuration in the browser without downloading anything. For server backups you can look inside the archive and pull out a single file rather than fetching gigabytes.
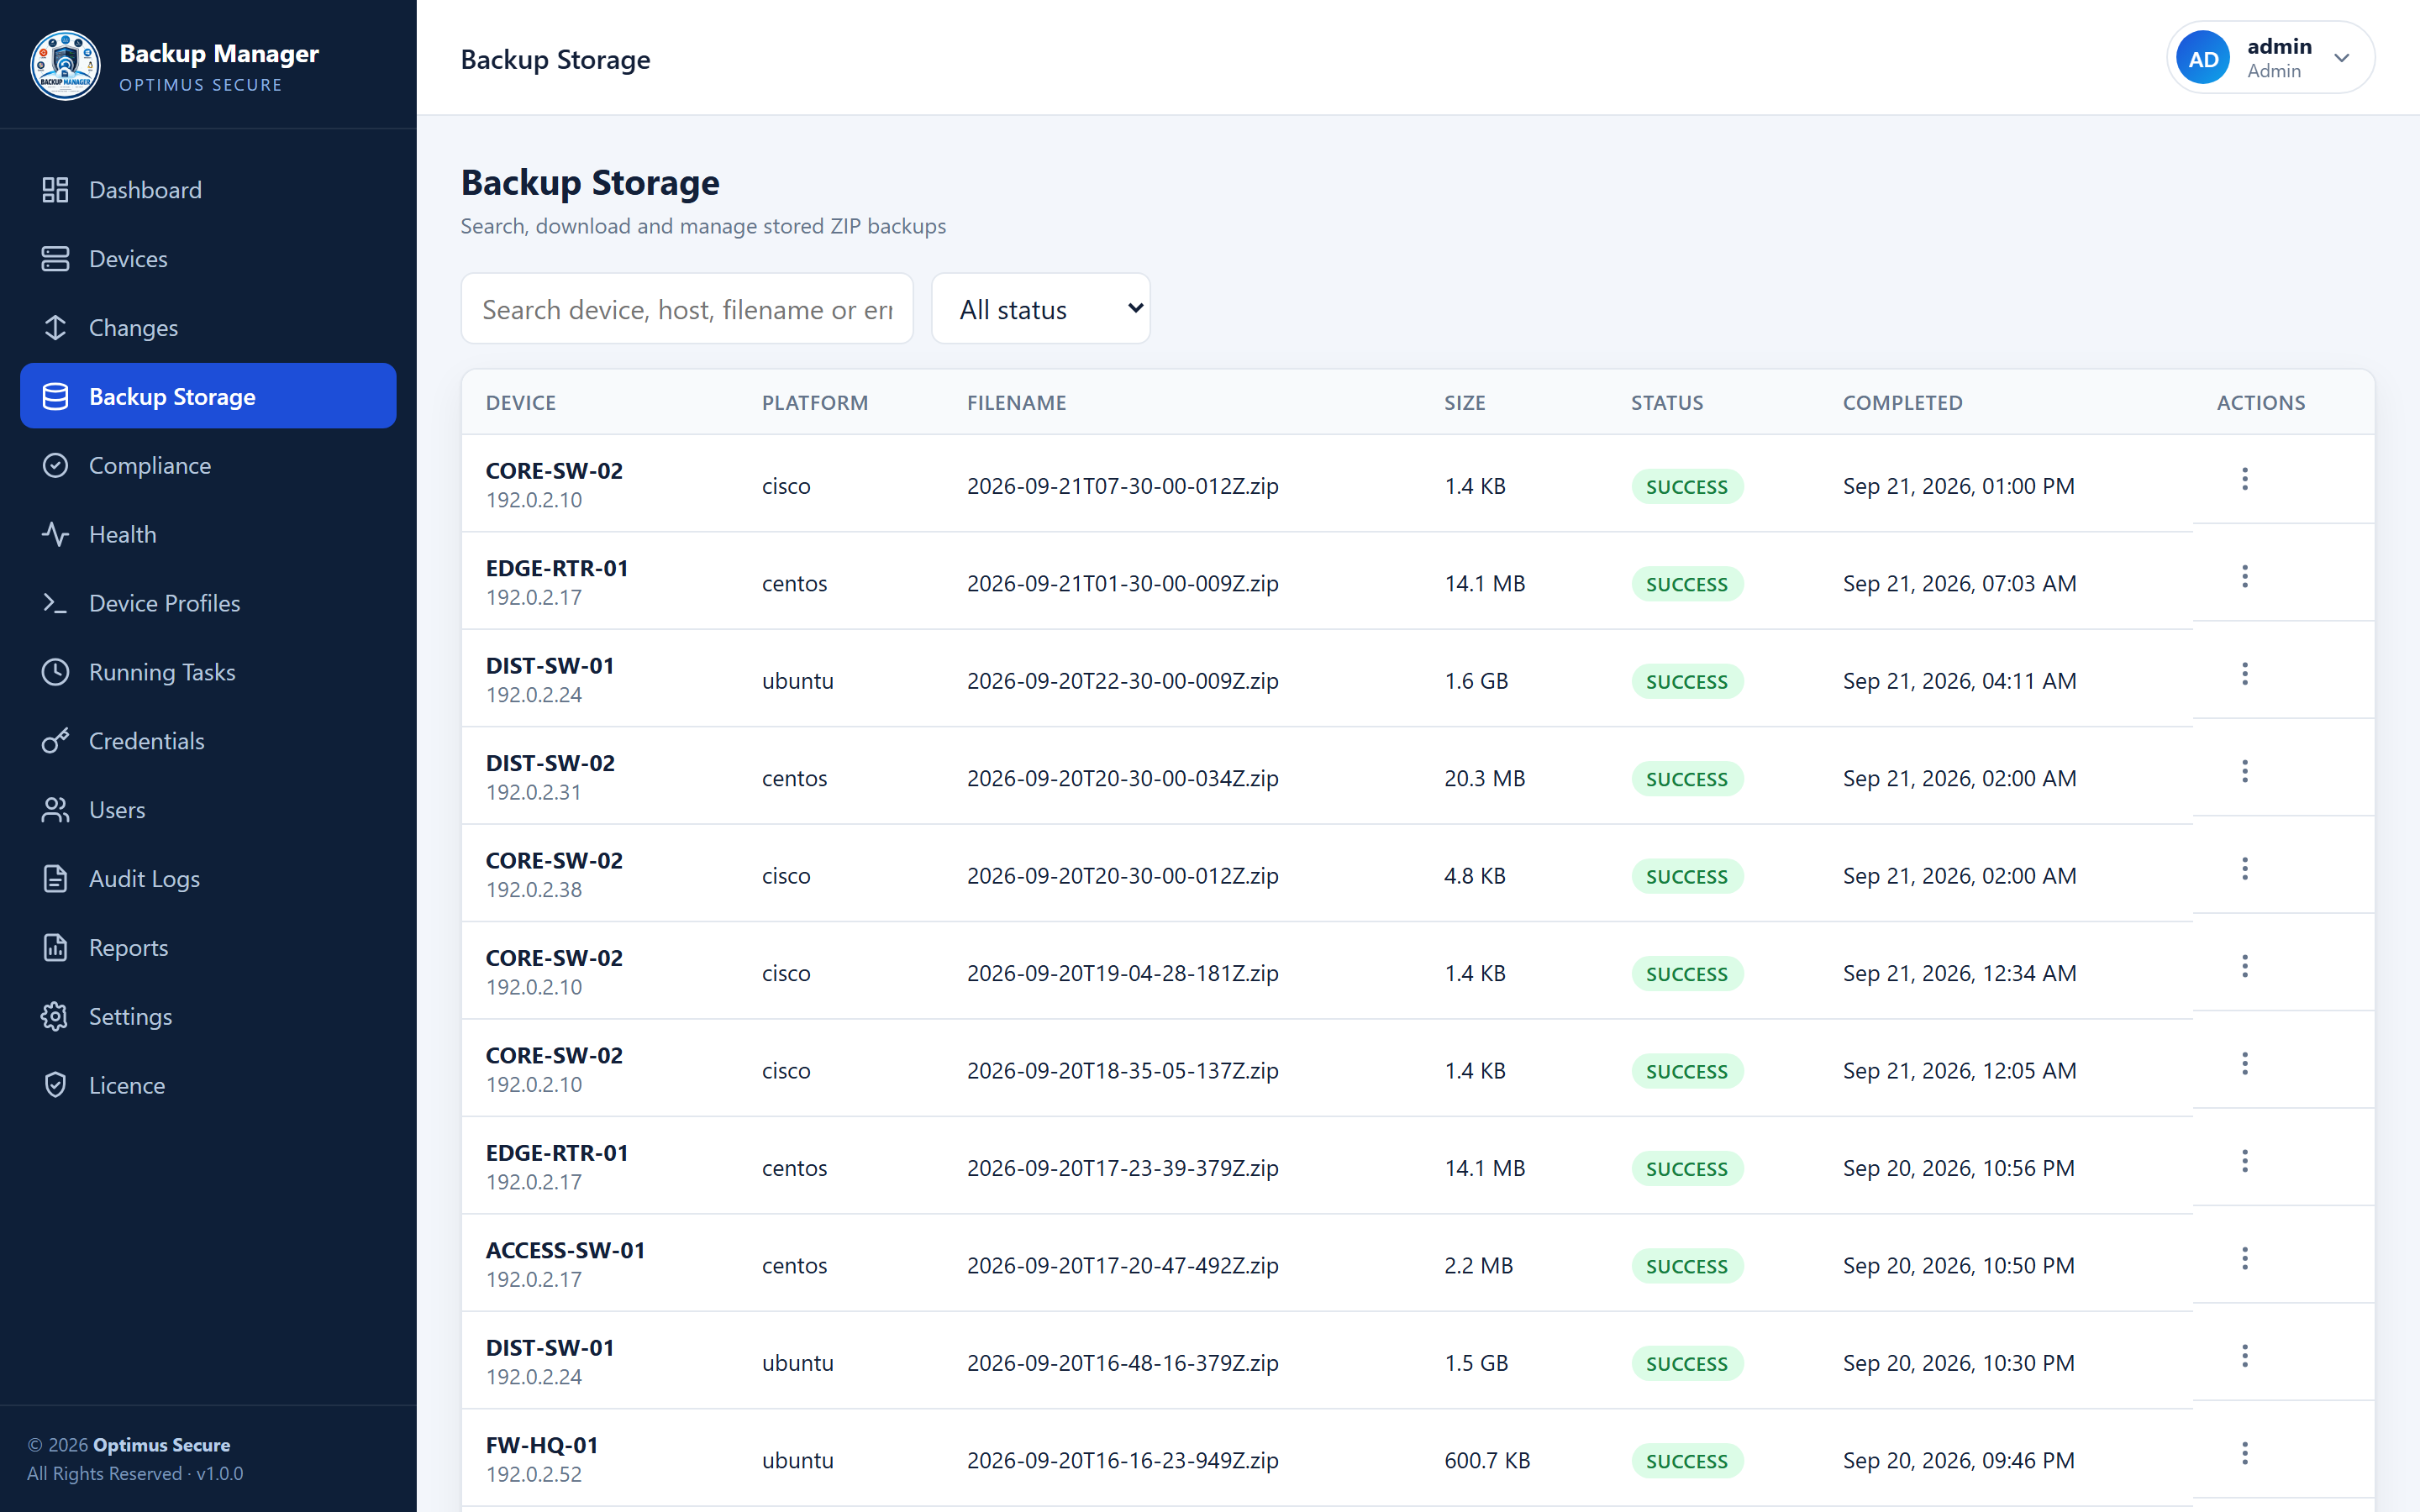
Backup Storage — every stored archive, with view, download and delete on each row.
Restoring a configuration
Push a stored version back to a device — with a dry run first.
Find the version you want
Open the device history and pick the version from before things went wrong.
Run it as a dry run first
This shows you exactly which commands would be sent, without sending them. Read that list before you go further.
Apply it
The commands are sent and the whole session transcript is recorded, so there is a record of precisely what was done and how the device replied.
Config Push
The same change, on many devices, without typing it many times.
Open Config Push. The page is three steps on one screen: what to send, where to send it, and what happens around it.
1 · What to send
Type the commands one per line, exactly as you would
type them into PuTTY. Nothing is added or rewritten — if the change needs
enable, configure terminal and
write memory, those are lines you type. A line starting with
# is a note to yourself and is not sent.
A command can carry values that differ per device:
{{name}}, {{host}},
{{username}}, {{platform}} and
{{tags}}. Sets you use often can be saved by name and loaded again.
enable, the enable
password already stored for that device is sent for you — so it never has to be typed into
the box. Passwords written into a command do reach the device as typed, but are masked
(********) in the record kept afterwards.2 · Where to send it
Tick the devices. Search by name or address, narrow by platform, or use Select shown to take everything the filter is showing. Nothing is ever sent to "all devices" by default — the Push button stays disabled until you have chosen, and it tells you how many it will reach.
3 · Try it on one device first
Try on one device opens a live session to a single device from your selection. Press Run my commands here and you watch the device answer line by line. There is a box at the bottom to type anything else you want to check, and the session stays open while you do. When it looks right, Looks good — push to N takes you straight to the rest.
This is the same code that runs the real push, so what you see here is what the other devices will do.
Just opening a device
Every device in the list has a Console button, and there is an Open a device console button with the others. Either one opens a real terminal on that device — no commands to write first, nothing to select.
It behaves the way PuTTY does, because every key you press goes straight to the device rather than being collected into a line first:
| Tab | Completes the command or path, from the device itself. |
| ? | The context help a switch prints while you are part way through a command. |
| Up and down arrows | The device's own command history. |
| Ctrl-C | Stops whatever is running, straight away. |
| Colours and paging | Drawn properly, including --More--
and anything that redraws the screen. |
| Window size | Sent to the device and updated when you resize, so it wraps and pages to what you are actually looking at. |
Paste sends a block of text — a config stanza, for instance — as if it had been typed, and Maximise gives the session the whole window. The device is told the new size, so it wraps and pages to what you are actually looking at. The same button is on the configuration viewer.
What happens around the change
| Back up before | On by default. A device that cannot be backed up is left alone rather than changed blind. |
| Back up after | On by default. The Changes page then shows the exact diff the push produced. |
| Stop at the first failure | Off by default. Turn it on when one bad command should not reach the rest. |
| Devices at a time | How many run in parallel. Three is a sensible start. |
| Preview what will be sent | Shows the exact lines each device would receive, with the
{{…}} values filled in, without connecting to anything. |
While it runs, and afterwards
Each device gets a row: waiting, running, done, failed or skipped, how far through the set it got, and how many configuration lines changed. What happened opens the full transcript for that device — every command and everything the device said back. You can stop a push part way; devices already changed stay changed, and the rest are skipped.
When a device says no
A device that answers Invalid input, % Incomplete command or command not found is marked failed rather than counted as a success, and the rest of the set is not sent to that device — running the remaining commands after one was refused is how half a change gets made.
The row tells you both things you need: how many commands went in before it stopped, and what the device actually said. The same reason appears against the run in Recent pushes, so you do not have to open anything to see it.
wr or
write memory is refused inside
configure terminal — the device answers
% Incomplete command. End the block with end first,
or use do write memory. The commands before it have already
been applied; the row says so.Config Push needs the operator or administrator role. A viewer cannot open it.
Reports
Charted PDFs, on demand or emailed on a schedule.
Backup summaries, compliance status, change history and device health can each be produced as a PDF with charts and tables. Download one whenever you like, or set up a schedule — weekly, or a date and time you choose — and have it emailed to whoever needs it.
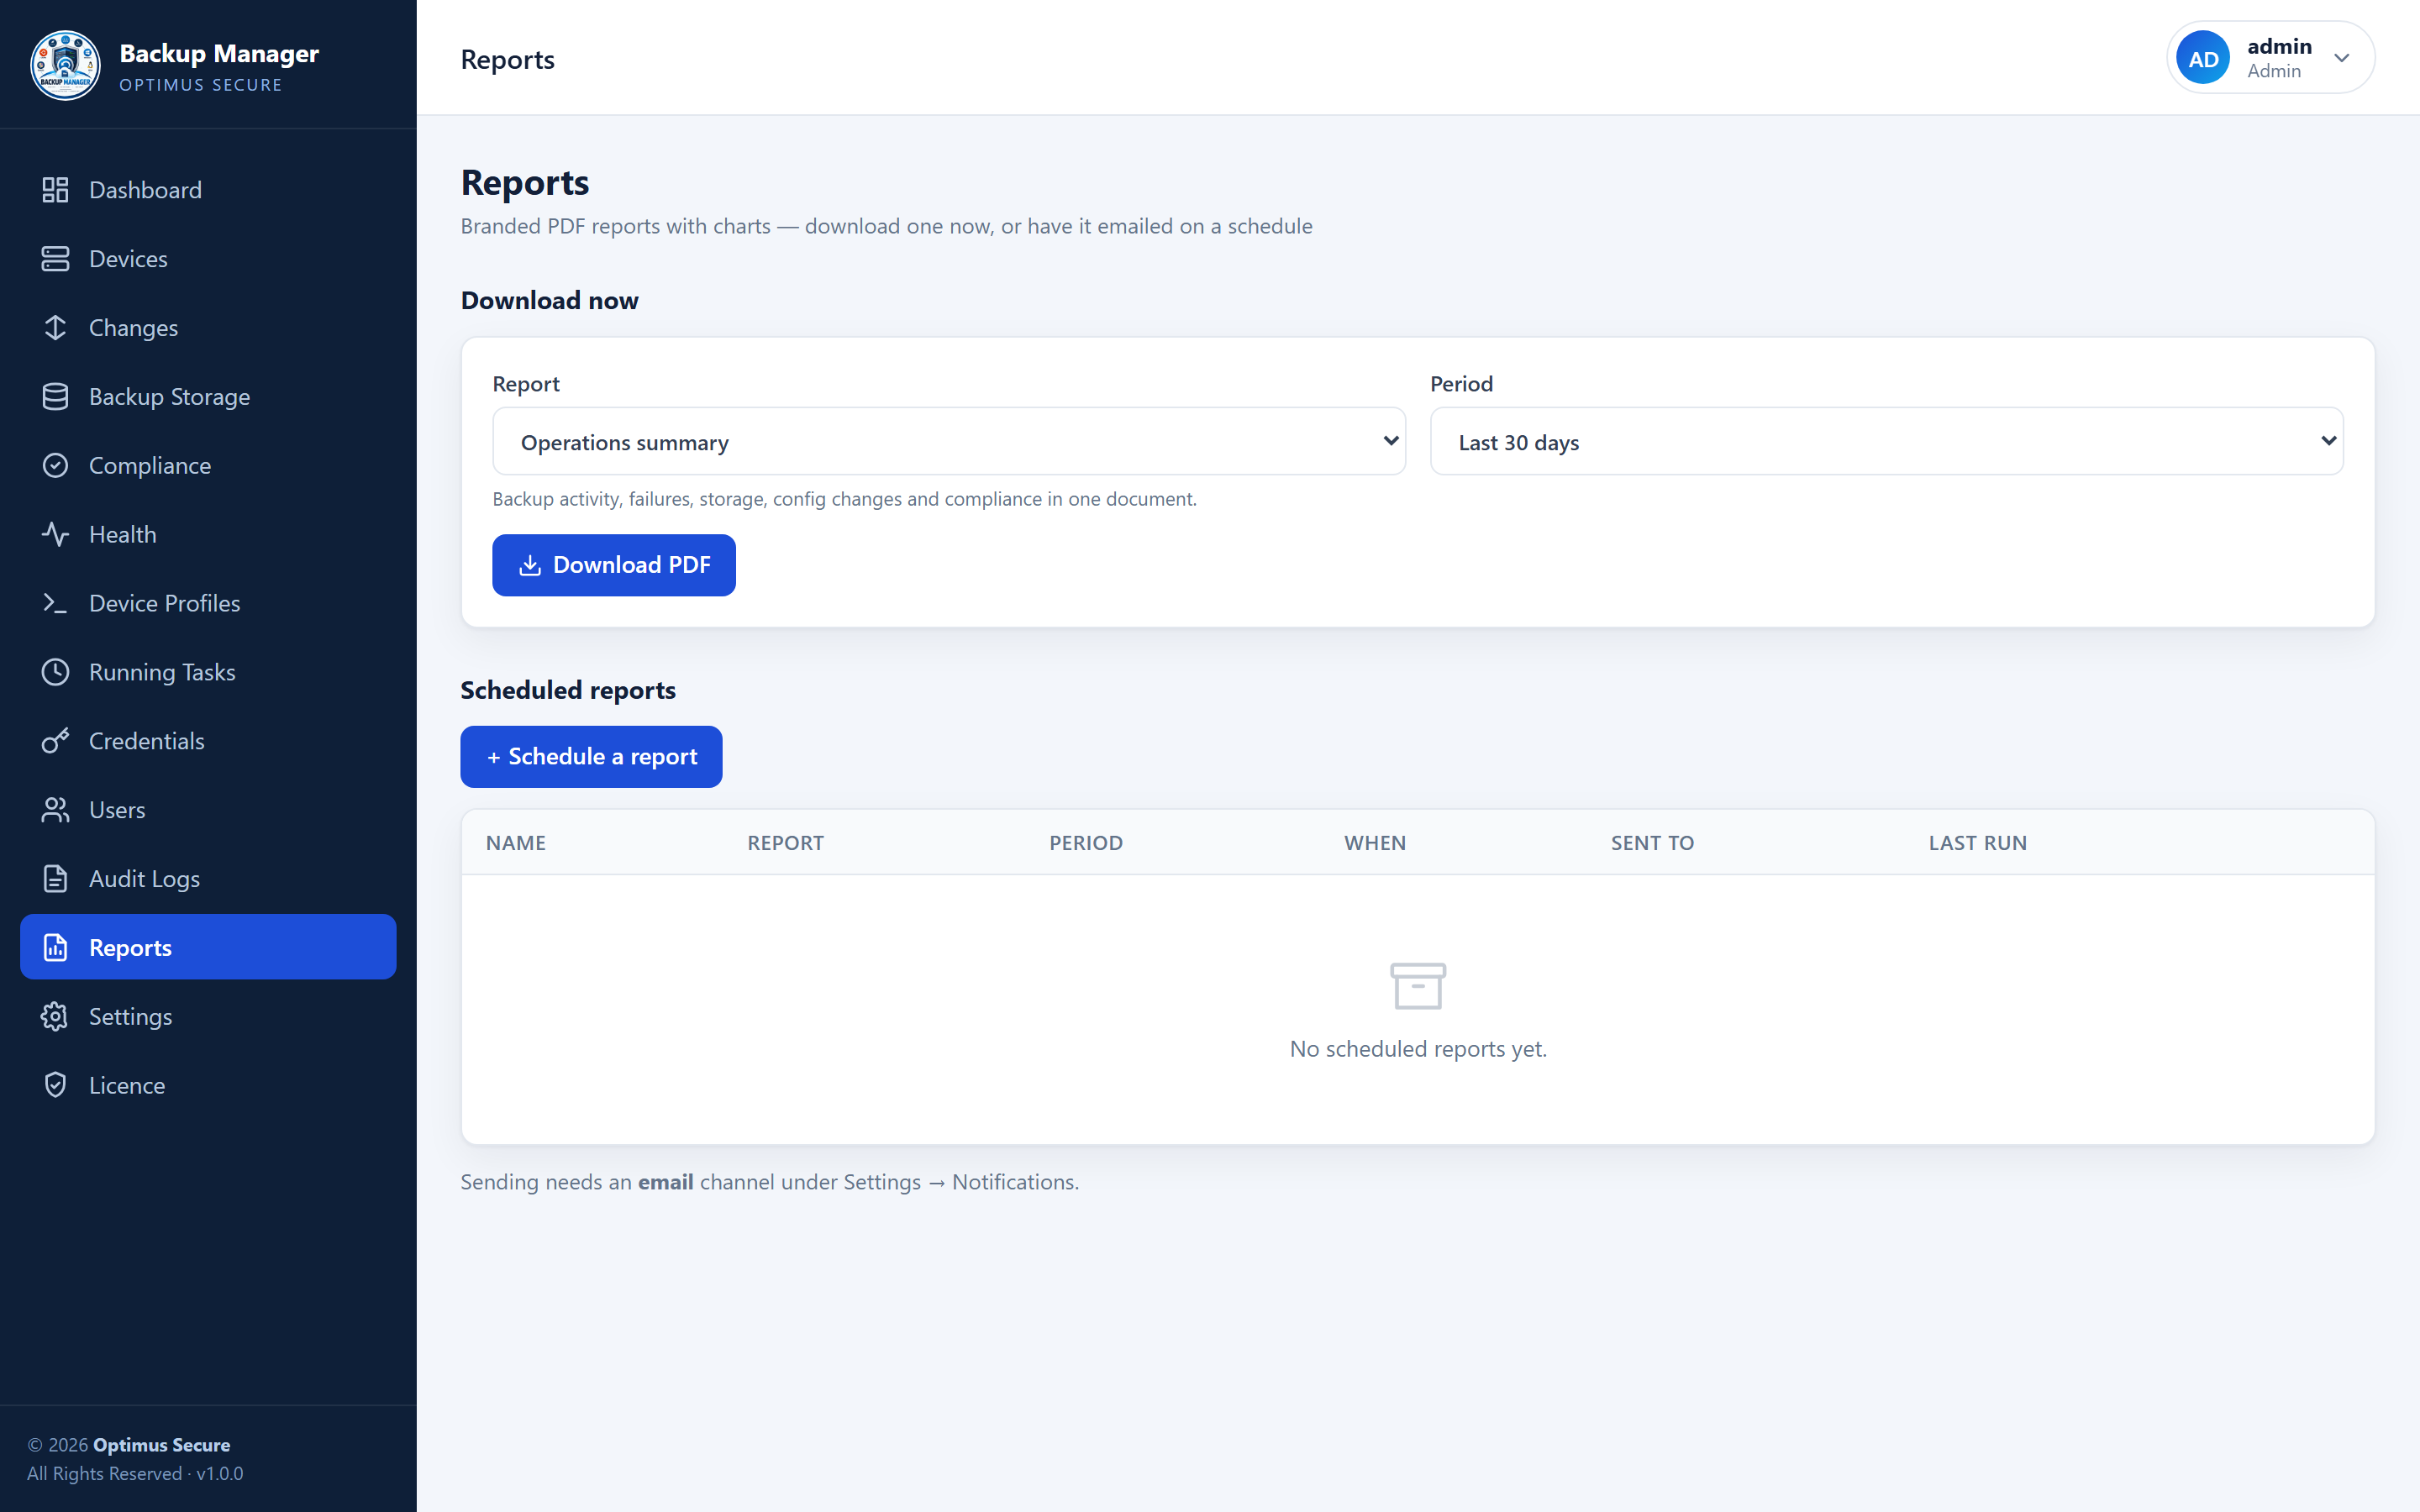
Reports — scheduled reports, their recipients and when they last ran.
Health and alerts
The page that answers "what is broken right now".
Health separates devices that have never backed up successfully, ones that used to and have stopped, and ones failing repeatedly. It is the page to look at first thing, and the one to check after adding a batch of devices.
Set up notifications under Settings so you do not have to look. Email, a webhook or Slack, triggered when a job fails, when a configuration changes, or as a daily summary at a time you pick.
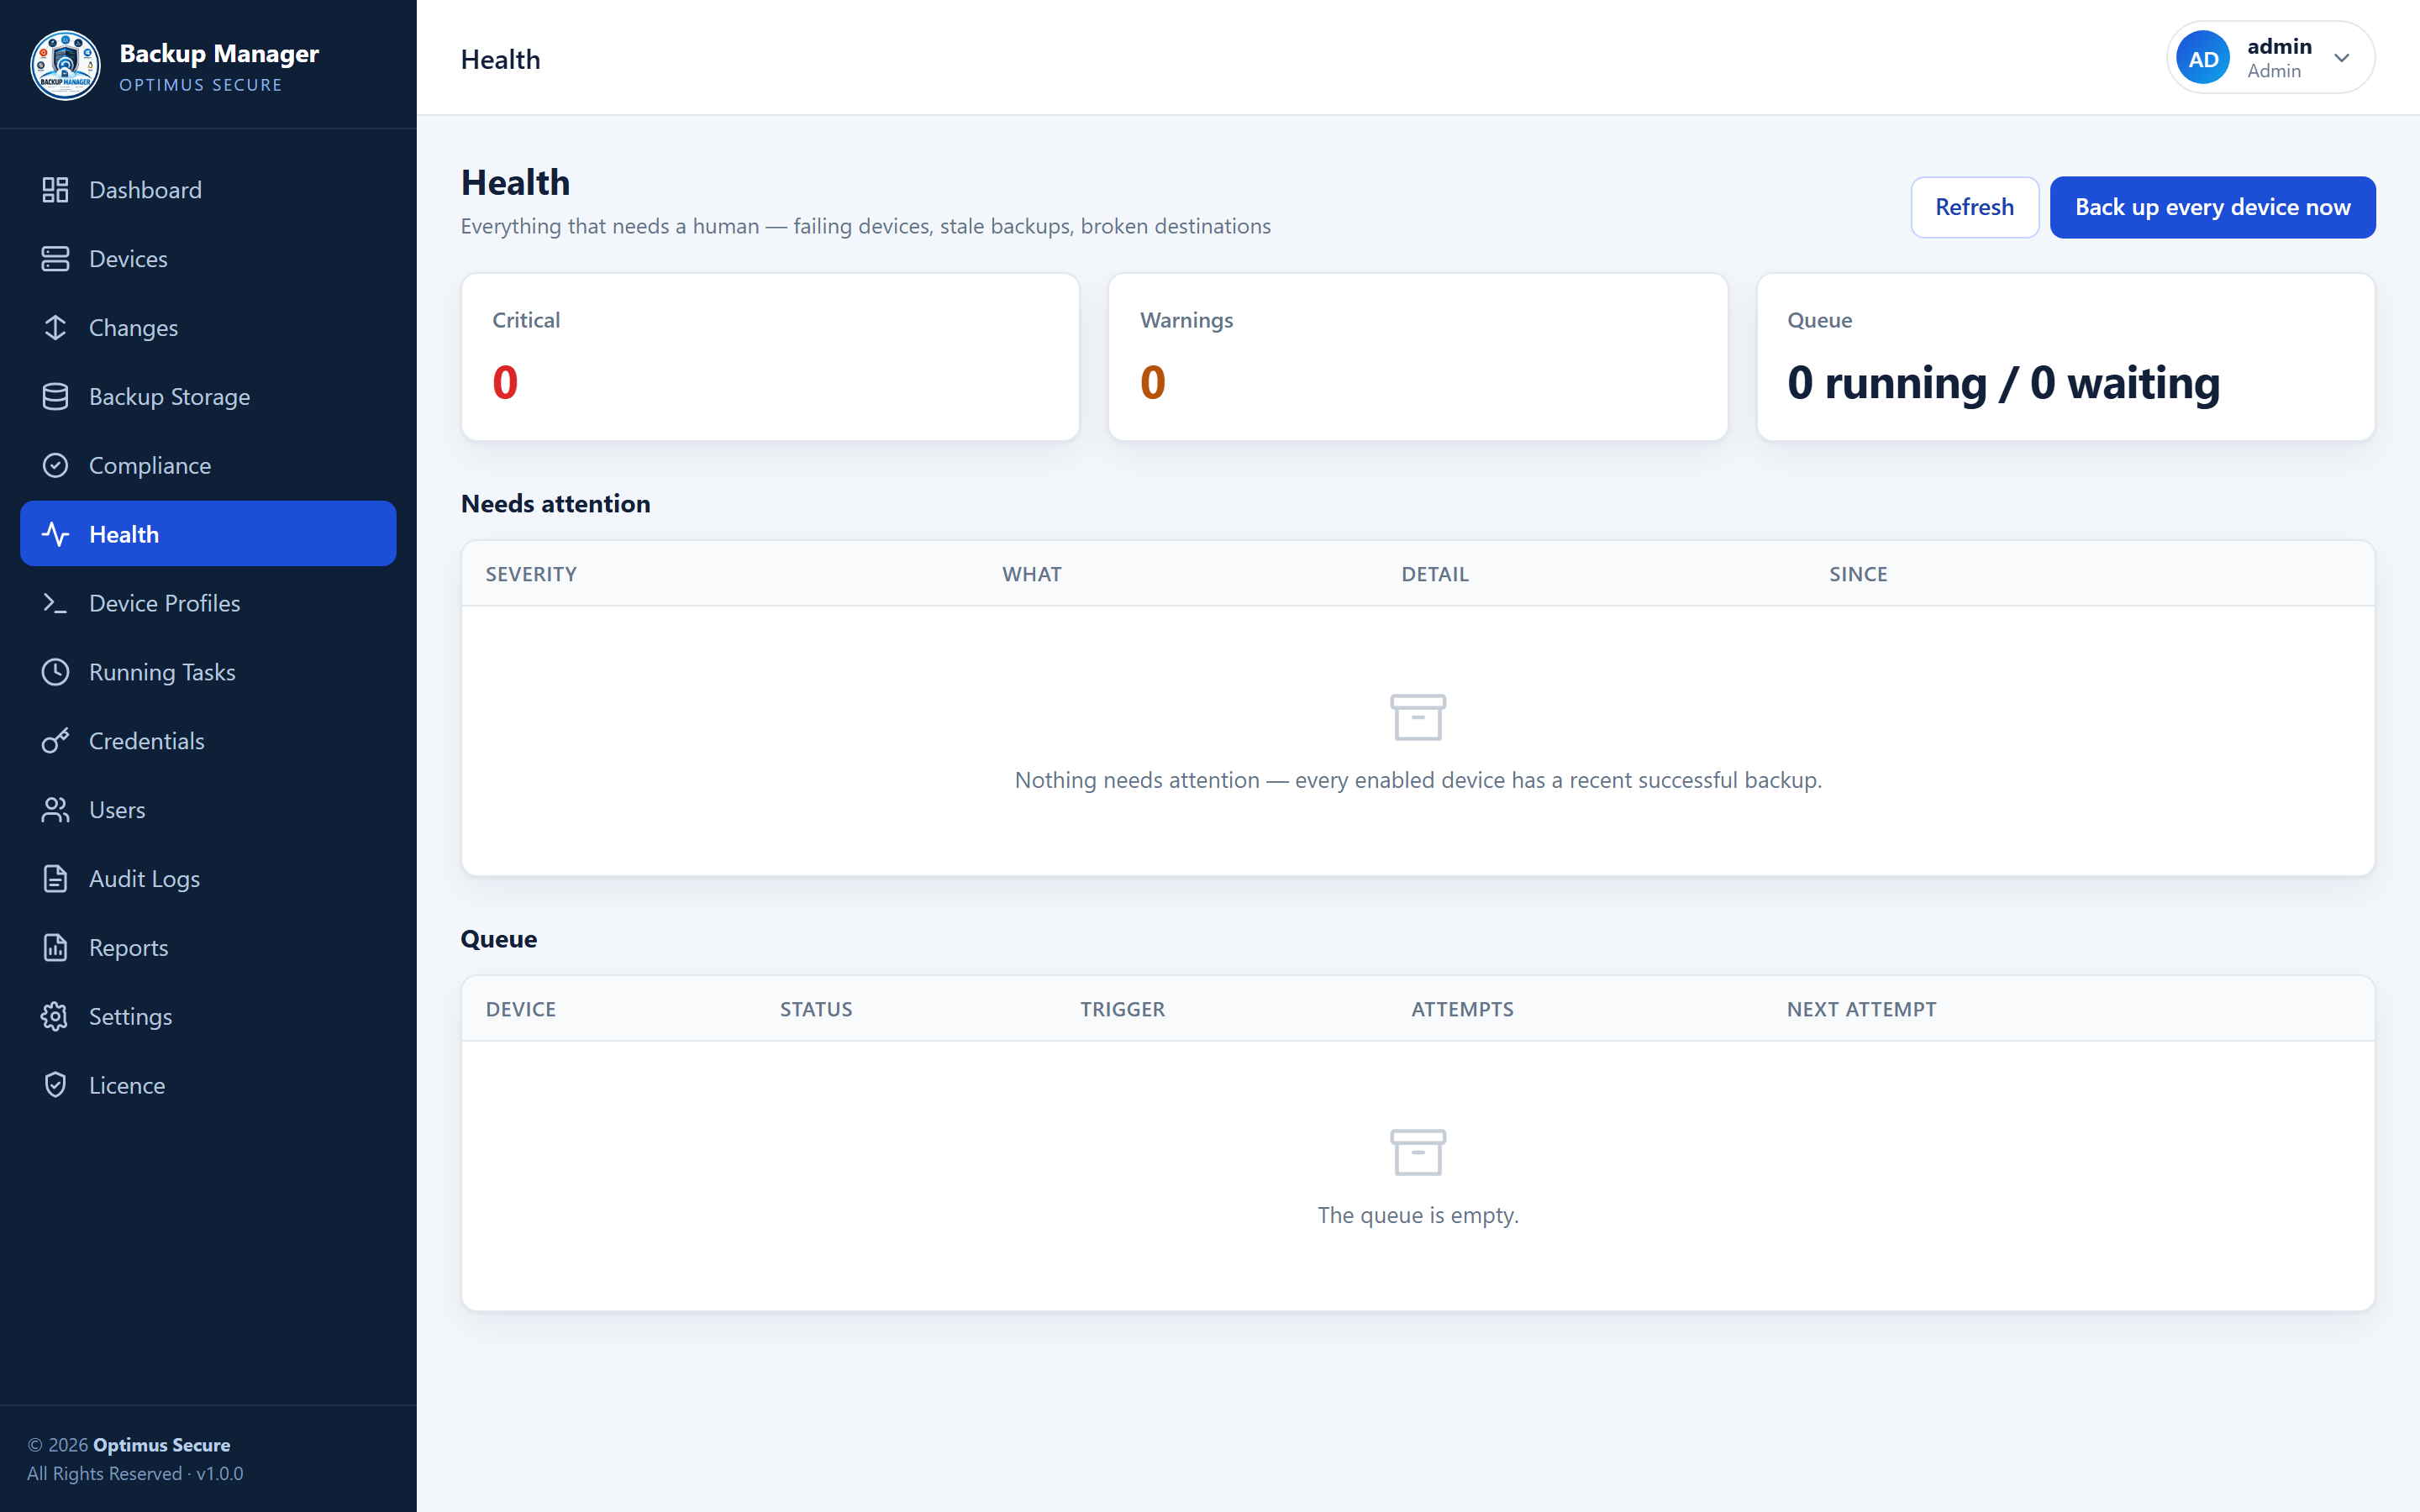
Health — never backed up, stopped backing up, and repeatedly failing.
Off-site copies and retention
A backup that only exists on the backup server is one failure away from not existing.
Under Settings you can point Backup Manager at S3-compatible storage and have every archive mirrored there automatically. If the backup server itself is lost, the backups are not.
Retention keeps the disk from filling up. As well as a simple age limit per device, there is a grandfather-father-son scheme that keeps a number of daily, weekly and monthly copies — so you keep a year of history without keeping a year of daily archives.
Users and roles
Three roles, so not everyone who can read a config can change a device.
| Admin | Everything, including users, settings, licence and restore |
| Operator | Devices and backups — can add devices and run backups, but not change users or settings |
| Viewer | Read only — can look at backups, changes and reports, and change nothing |
There is also an audit log of every action taken, and a login history. For scripts and monitoring, create an API token under Settings rather than sharing an account password.
Managing the service
The handful of commands worth knowing.
| Check it is running | sudo systemctl status backup-manager |
| Restart it | sudo systemctl restart backup-manager |
| Watch the log live | sudo journalctl -u backup-manager -f |
| Last 100 log lines | sudo journalctl -u backup-manager -n 100 |
| Stop it | sudo systemctl stop backup-manager |
Updating
From the dashboard, or from the terminal. Your data is never touched.
From the dashboard
Open Licence and press Check for updates. If a newer release exists you get the version, its size, when it was published and what changed — and an Install update button next to it.
The page follows the update as it runs. Part way through, the service restarts — that signs you out, which is expected. Sign back in and the Licence page picks the update back up and tells you how it ended.
From the terminal
The same update, run by hand. It asks the licence server what is available, shows you the release notes, and installs it if you say yes. The download is checked against a published SHA-256 and refused if it does not match, so a tampered mirror cannot push code onto your server.
| See what is available without installing | sudo backup-manager-update --check |
| Install without prompts | sudo backup-manager-update --yes |
| Go back to the previous version | sudo backup-manager-update --rollback |
What happens to your data
Your database is copied aside first, the new version is put in beside the old one, and the service is switched over. If the new version does not come up healthy, the old one and the database go back automatically — by either route. Backups, configuration and history are never replaced.
Troubleshooting
The things that usually go wrong, and what they mean.
| The dashboard is not on port 3000 | The installer asks for another port when 3000 cannot be used, and prints the address it settled on. grep PORT /etc/optimus-backup-manager/backup-manager.env shows it at any time. To move it deliberately, run the installer again with --port. |
| Cannot open the dashboard | Check the service is running (systemctl status backup-manager) and that the port is open in the firewall. |
| A device fails with a handshake or algorithm error | Older equipment needs legacy algorithms. Edit the device and turn that option on — it makes the connection negotiate the way PuTTY does. |
| Login works in PuTTY but not here | Usually an enable password that has not been filled in, or a profile whose prompt does not match this device. Use Test Connection — it shows what the device actually sent back. |
| The host key changed | The device was replaced or reinstalled — or something is in the way. Backup Manager refuses to connect until you look at it, which is the point. Confirm the new key under the host keys list once you are satisfied. |
| A backup is very slow | Almost always a server backup pulling directories you do not need. Use the tree picker to exclude them, and raise the parallel sessions for that device. |
| New backups stopped and there is a licence banner | The trial ended or the server could not be reached for several days. Everything already stored is still available. Open the Licence page and use Check now, or contact us. |
| "The system clock was moved back" | A licence term cannot be checked against a clock that goes backwards. Correct the time on the server, then acknowledge it on the Licence page. |
Getting help
Tell us what you were doing and what you saw, and send the log if you have it.
The quickest thing you can send us is the output of
sudo journalctl -u backup-manager -n 200 along with the device name
and what you were trying to do. For a device that will not connect, the Test Connection transcript
tells us most of what we need.